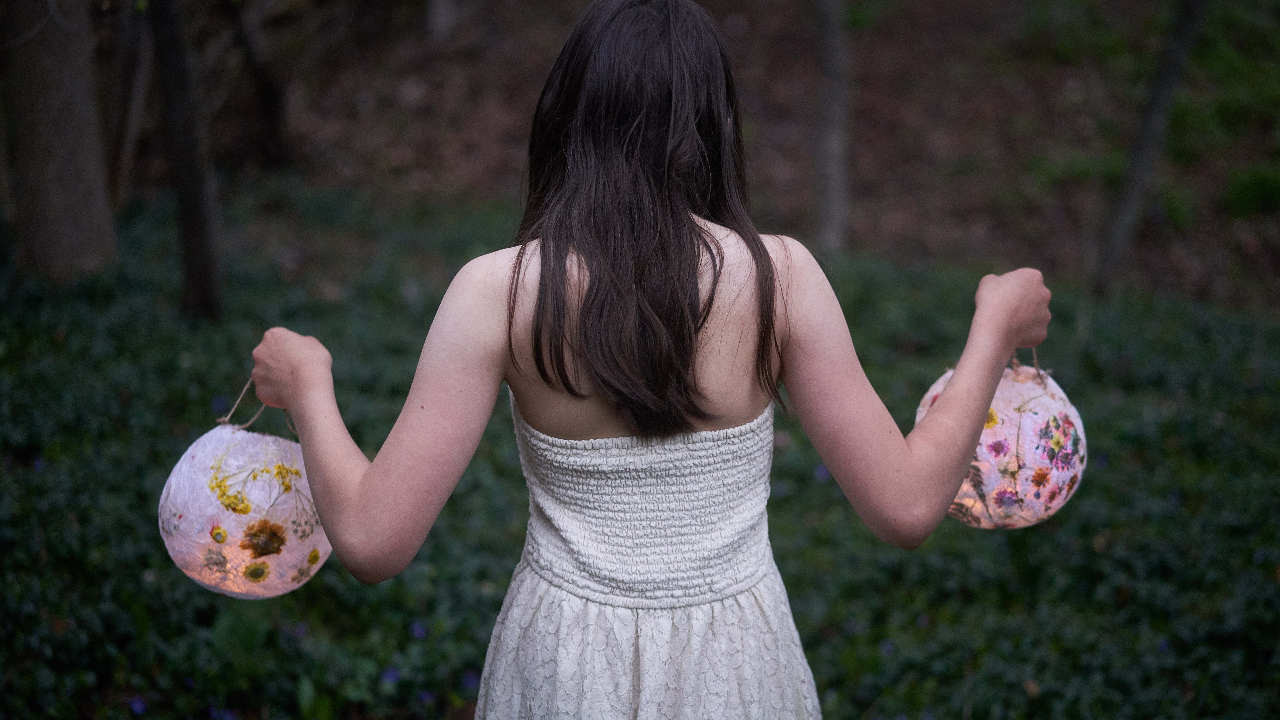
How to Make Paper Lanterns
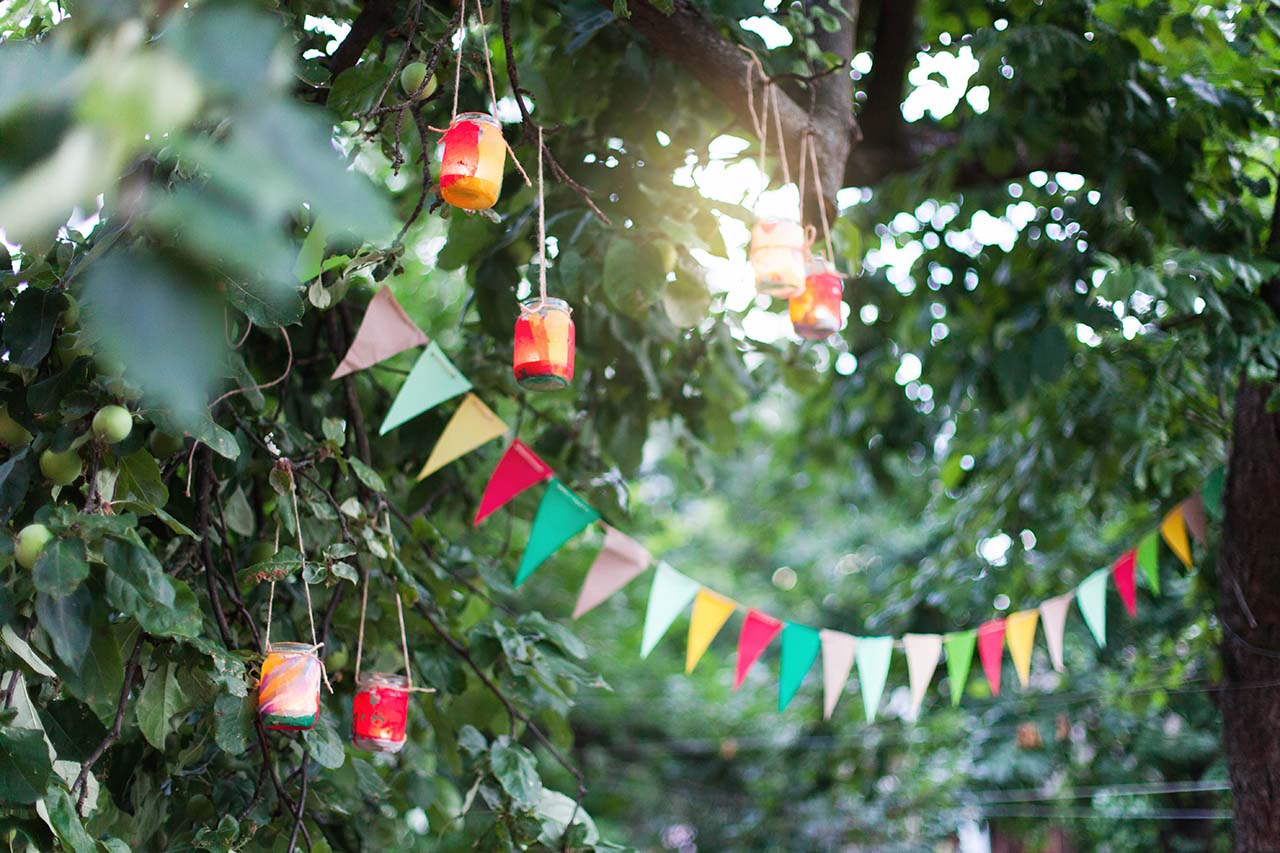
As we move away from the clutches of winter and the days grow longer and warmer, we're naturally drawn outdoors: surrounded by fresh scents, crackling evening fires, and even the occasional buzzing mosquito. With all this time spent under the open sky, it’s only natural to feel inspired to make our spaces more welcoming—to decorate, personalize, and add a bit of beauty to the places we gather.
That’s where a simple paper lantern craft comes in. Not only is it an easy way to add a warm glow to backyard evenings, but it also offers a fun, hands-on project that brings personality and magic to outdoor decor.
Welcoming the Light: Spring Lantern Traditions
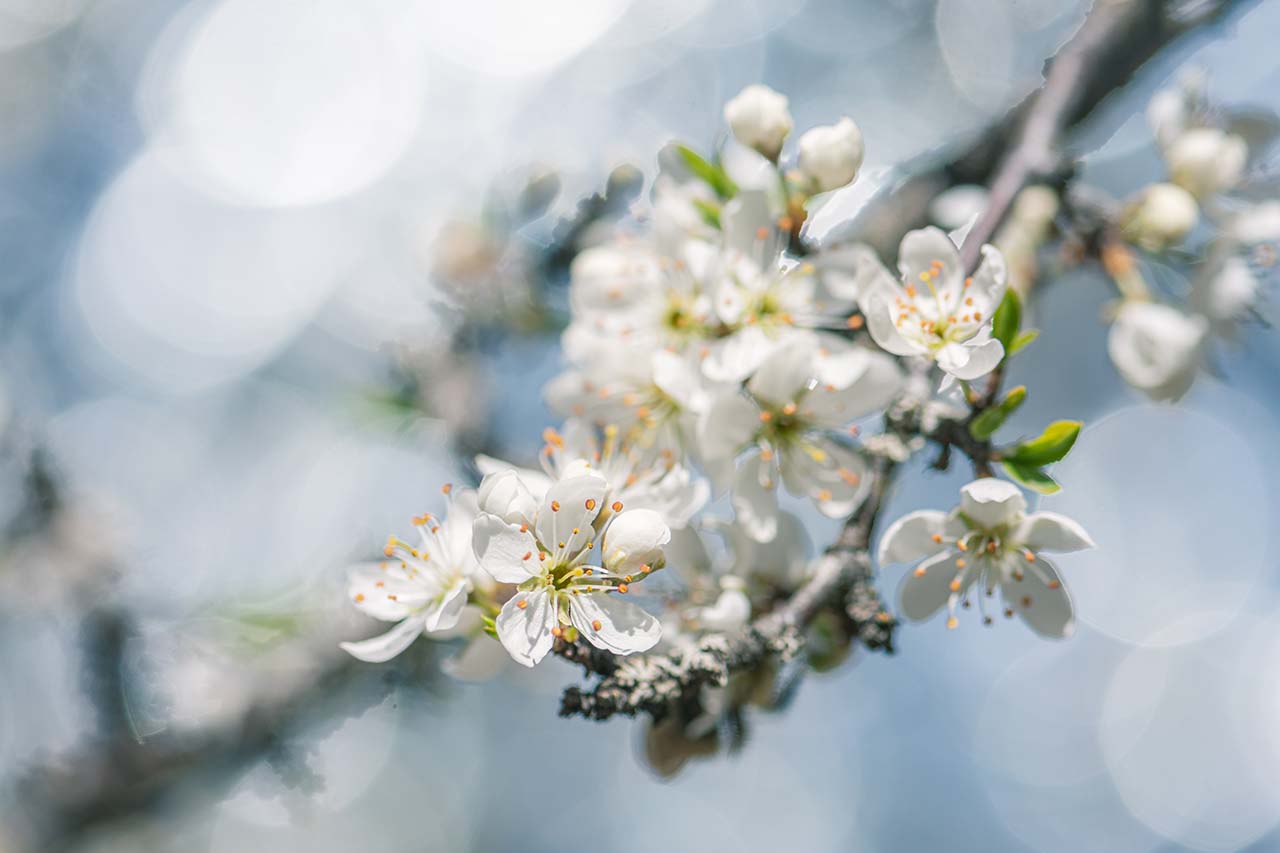
Though lanterns are often associated with autumn and winter, they also appear in a few springtime celebrations around the world. In Japan, paper lanterns softly glow beneath cherry blossoms during nighttime Hanami picnics. In parts of China, the Lantern Festival (sometimes falling near early spring) marks a joyful close to the New Year celebrations with floating or sky-bound lights.
And May Day, or Beltane, offers a beautiful opportunity to bring lanterns into spring. Celebrated on May 1st, this ancient festival welcomes the turning of the seasons toward warmth and abundance. Traditionally filled with flowers, dancing, and firelight, modern May Day festivities sometimes include lantern walks or handmade lanterns to honor the return of light and life.
Make Your Own Springtime Paper Lantern Craft
Making a paper lantern craft in spring is a creative and meaningful way to celebrate renewal and the longer, brighter days ahead. Let’s take a look at how to make your own.

What you’ll need…
- Balloons (1 for each lantern)
- White tissue paper
- School glue (at least one 5 fl oz bottle)
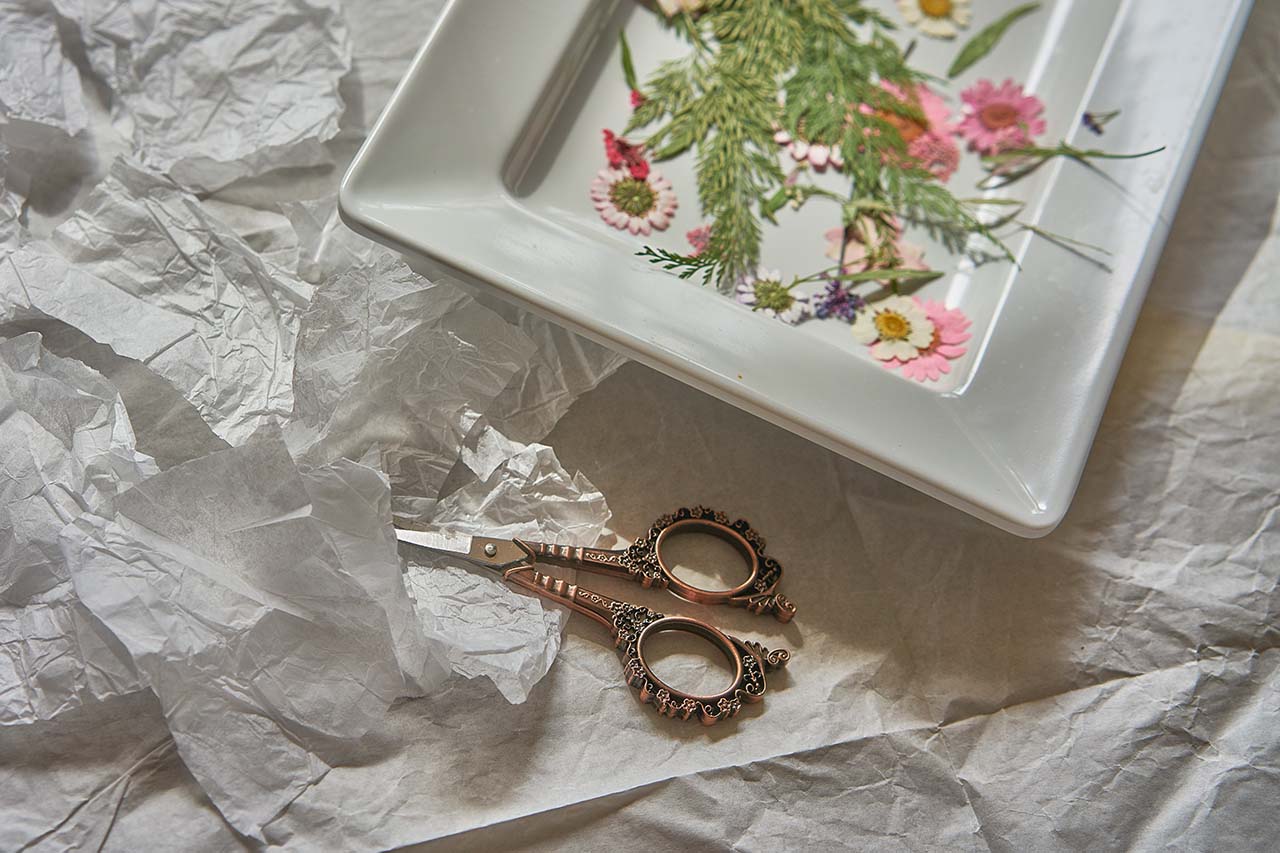
- Pressed plants (flowers and leaves)
- Broad or sponge paintbrush (for spreading glue)
- Two medium bowls
- Wide-mouth mason jar
- Single hole punch or awl
- A length of string or thin wire (about 2 ft long)
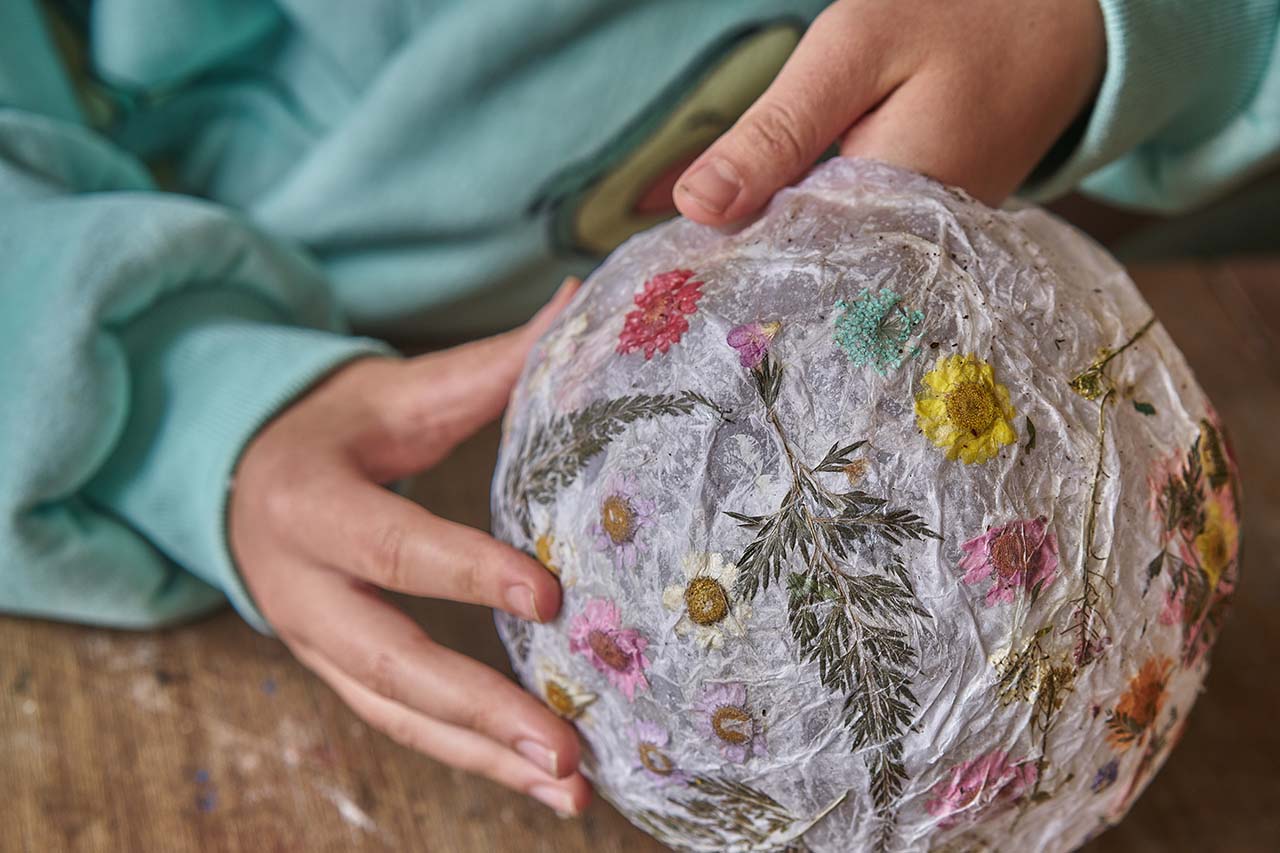
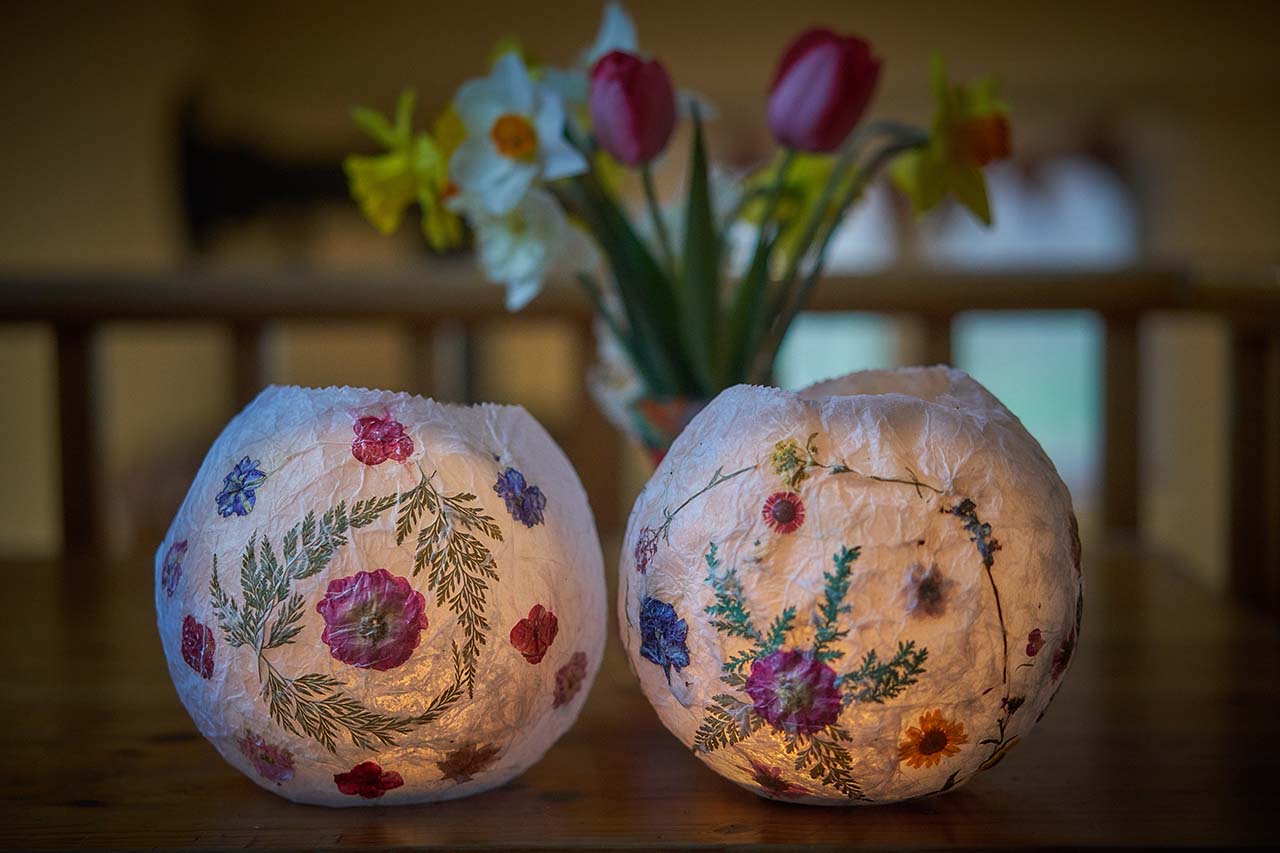
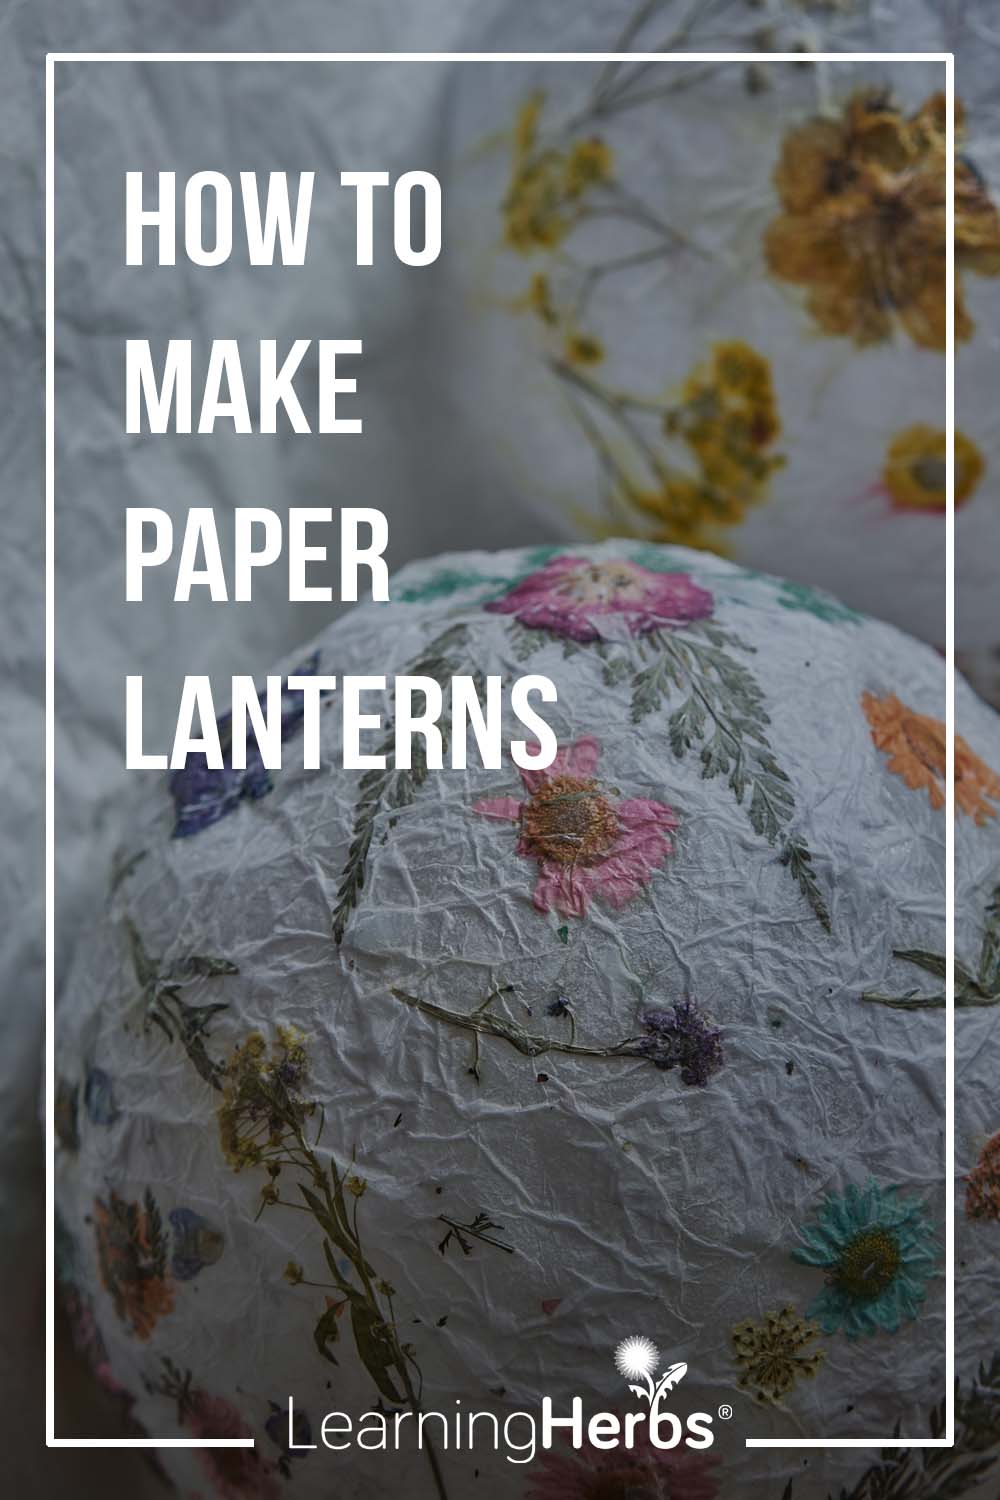
Step 1: Crafting the Lantern
- Using the paintbrush, mix equal parts glue and water in a medium bowl. Pour plain water into the second bowl.
- Blow up a balloon to about 4–6 inches in diameter, tie it, and place the base into the mason jar. You may need to tape the balloon to the jar or tie something heavy to the string to keep it snug inside.
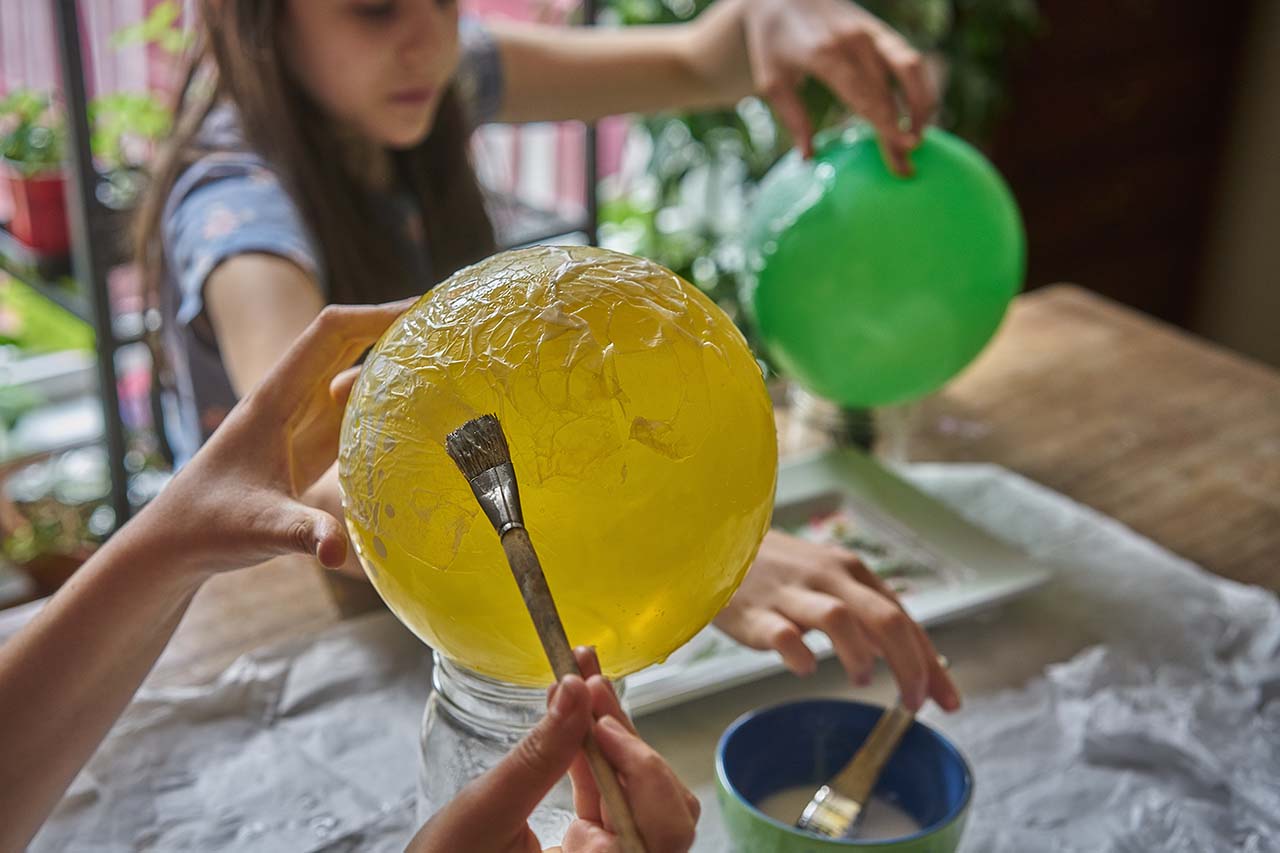
- Tear or cut your tissue paper into smaller pieces (about 2 to 3 inches per side). Soak a few pieces in the bowl of plain water. Begin covering the balloon with the wet tissue pieces (no glue yet), creating a single layer over the entire surface—except the part inside the jar. This initial water-only layer will help prevent the tissue and glue from sticking too firmly to the balloon, making it easier to remove once everything is dry.
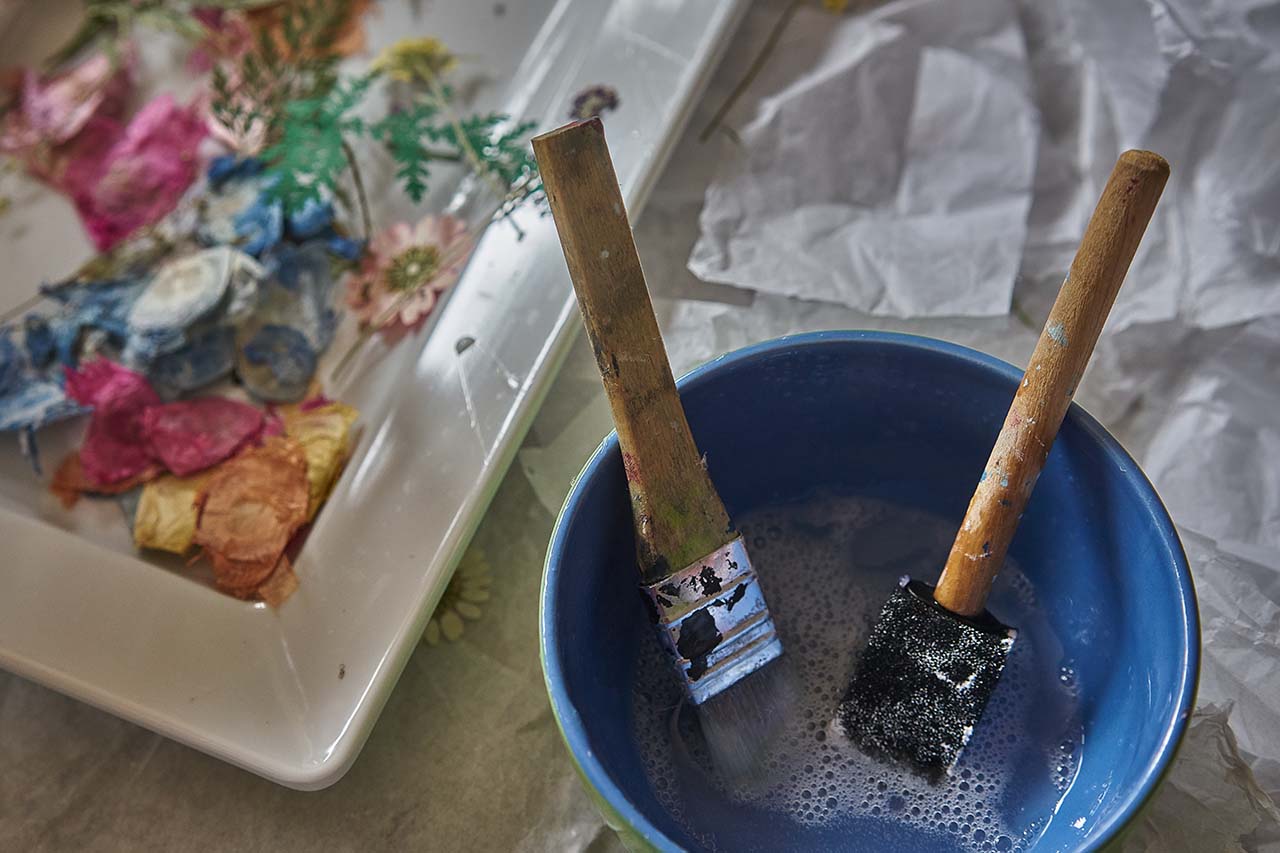
- Using a paintbrush or sponge brush, begin spreading the glue-and-water mixture over the wet tissue layer, working in manageable sections. As you go, add a second layer of dry tissue paper, then brush more glue mixture on top to secure it.
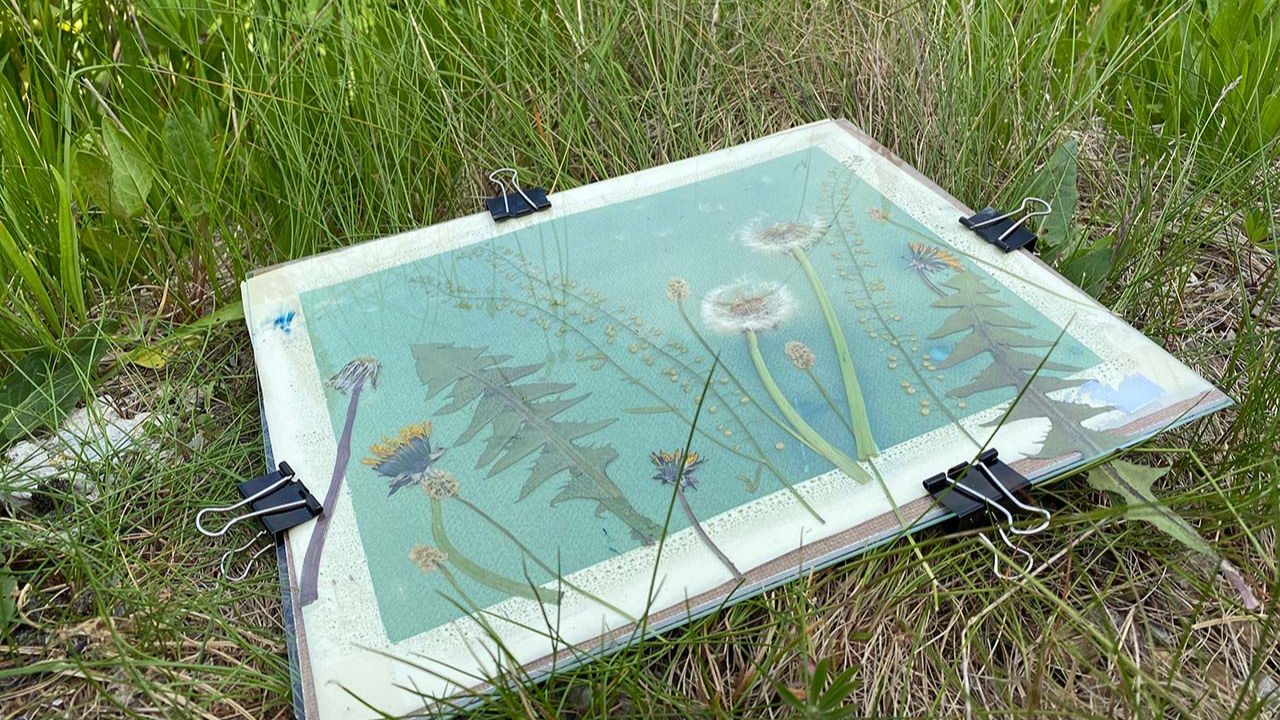
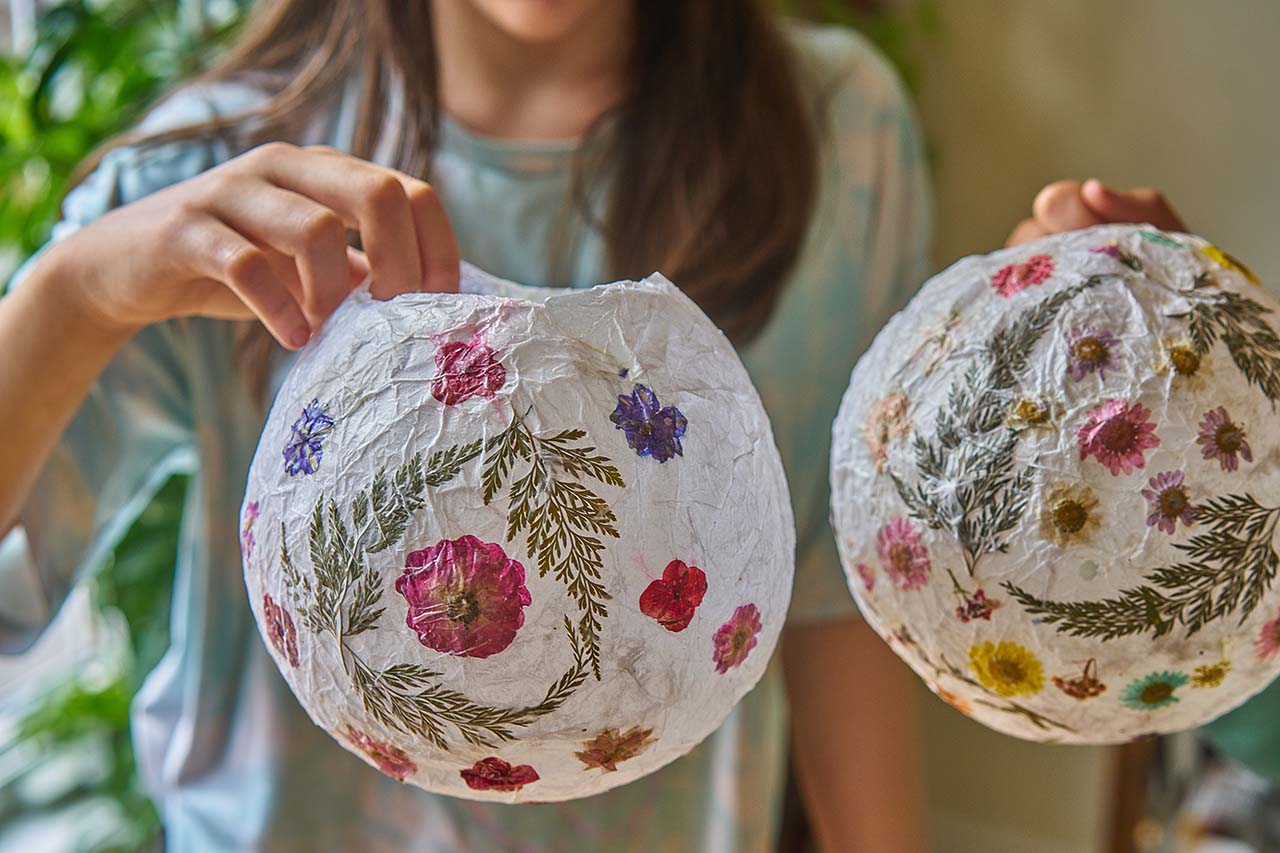
- Begin adding your pressed plants, arranging them however you like.
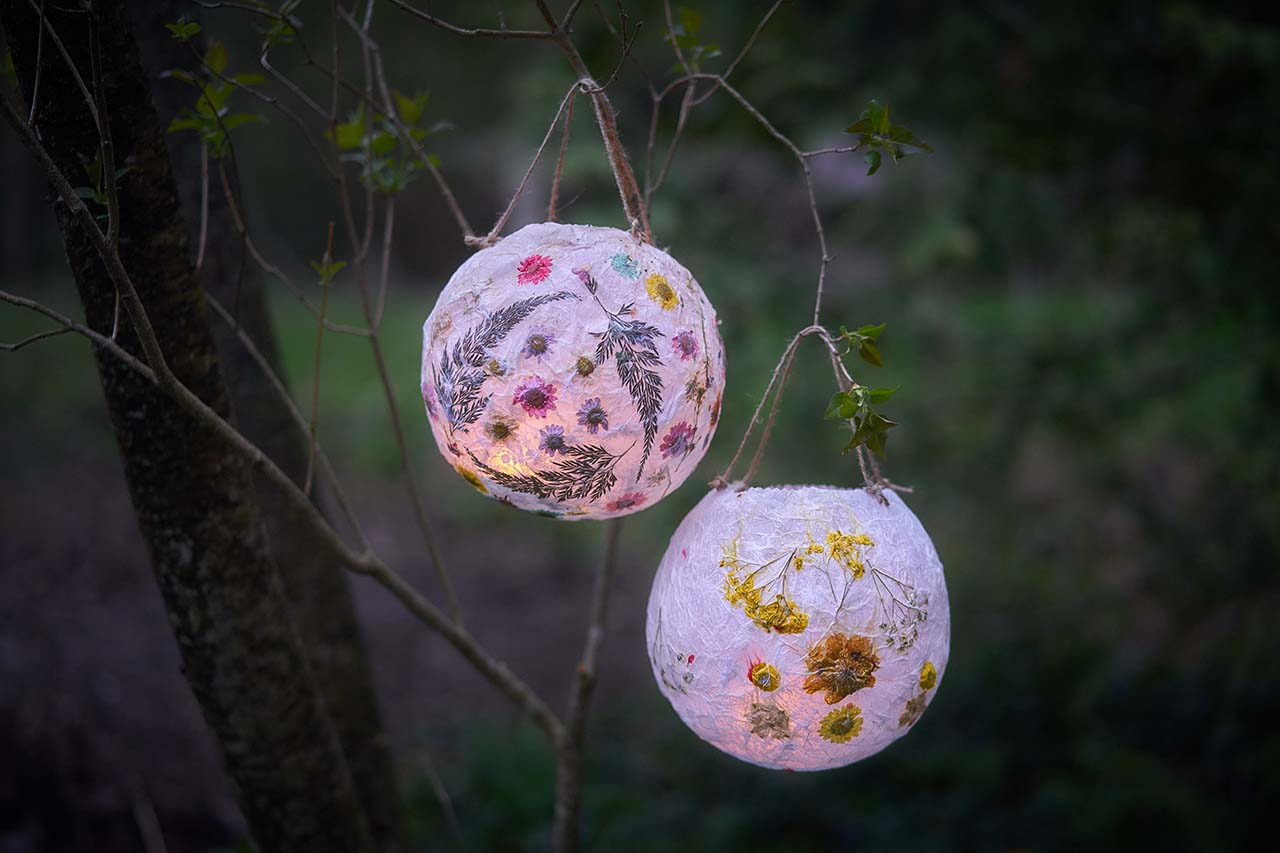
- Cover the plants and the second layer of tissue with glue, then add a third layer of tissue on top. You can also add more plants at this stage to create depth—some will appear fainter than others, giving your lantern a lovely layered effect.
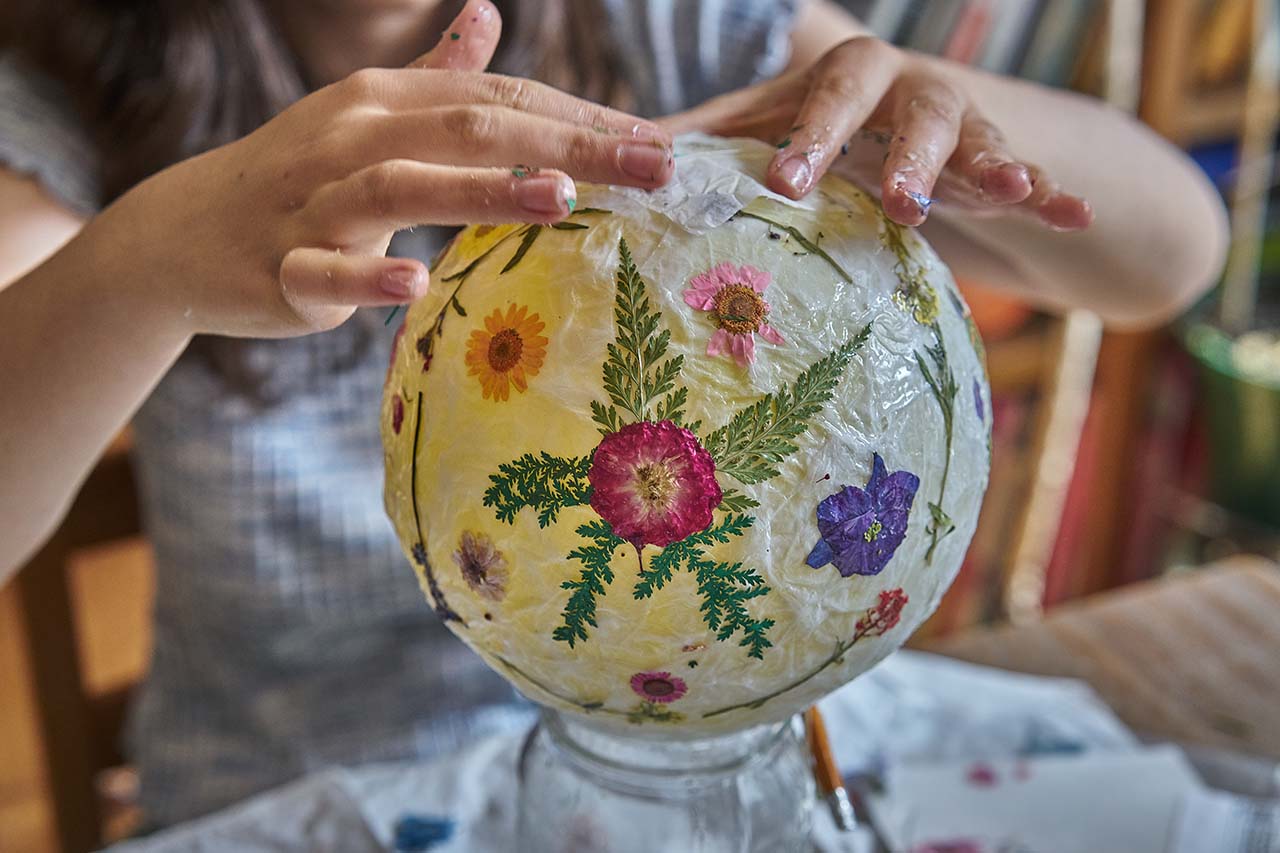
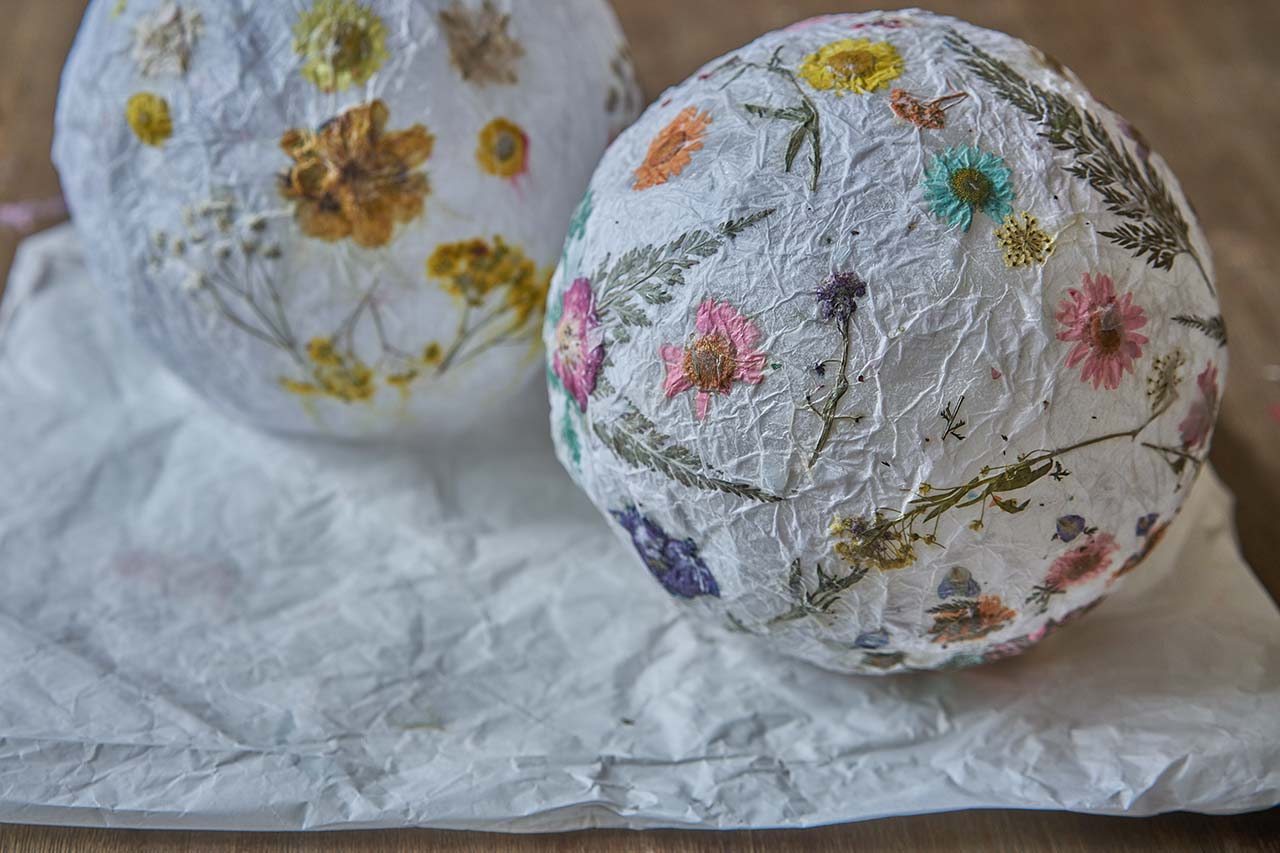
- Finally, cover everything with the glue-and-water mixture again, add a fourth layer of tissue, and cover it with glue as well. You can stop here or add a few plants on the outside layer to make them really pop—just be sure to coat them with glue. For a more subtle look, keep all your plants under the tissue layers. Four layers are enough—you don’t need more. The more tissue you add, the less light will shine through when your lantern is lit.
Step 2: Finishing and Assembling the Lantern
- Let your lantern dry completely—this can take anywhere from 6 to 24 hours or even longer, depending on humidity. Since glue may drip, leave the lantern on a protective sheet until it’s fully dry. Once it’s no longer drippy and can be set down without making a mess, carefully remove it from the jar and place it on a flat surface to allow the bottom (the part that was inside the jar) to dry fully.
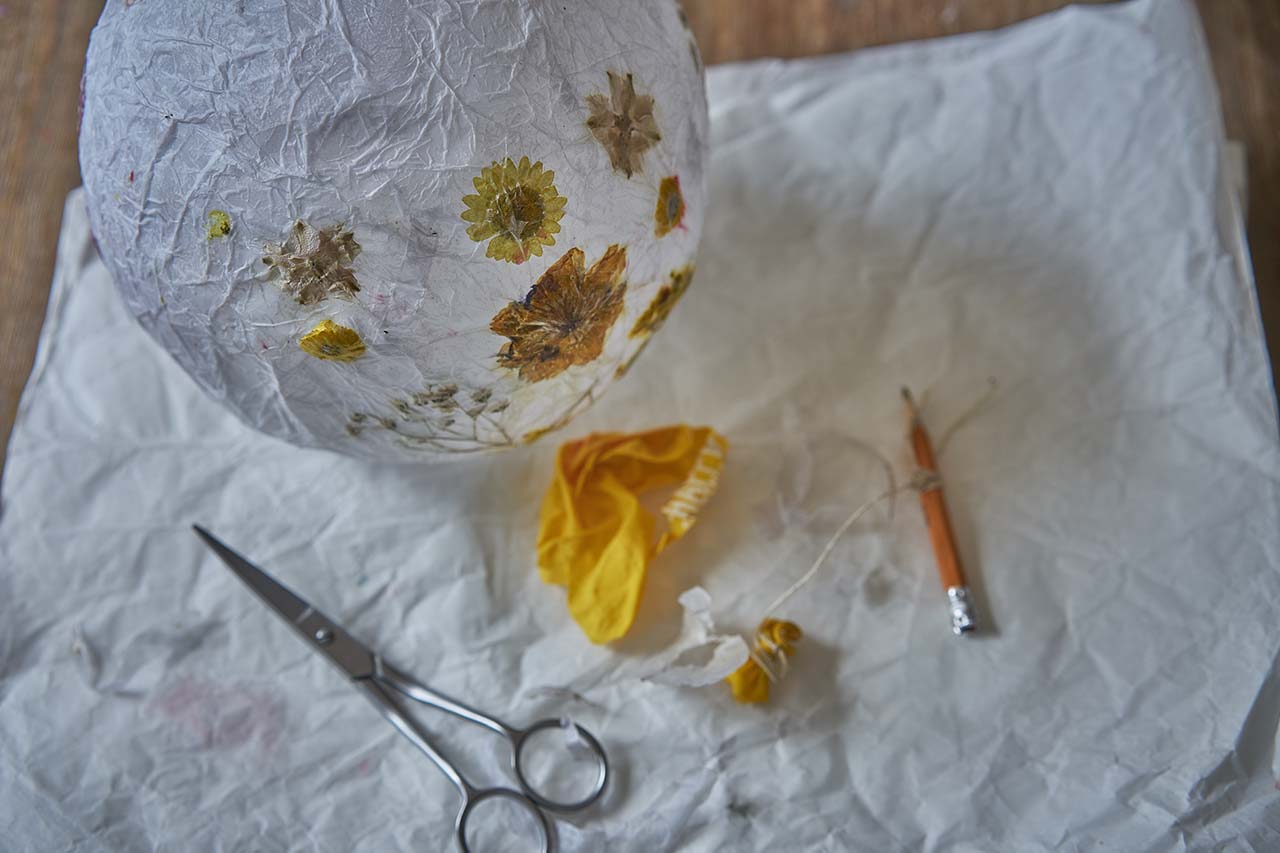
- Pop the balloon and carefully take it out from inside the lantern. Be patient! Trim any uneven or overhanging tissue around the opening (the part that was inside the jar) to make it neat and even.
- Gently press in the bottom of the lantern to create a flat base so it can sit without wobbling. Even if you plan to carry your lantern, you’ll likely want to set it down at some point. If you intend to keep your lantern stationary, you can skip the next step; otherwise, proceed to adding the handles.
- If you decide to use handles, use a single hole punch or an awl to make four holes around the opening of the lantern. Tie a string between two holes to form a handle, then repeat with the second set of holes. You now have two handles! If you prefer to hang your lantern, you can make just one set of holes and create a single handle instead.
- Your lantern is ready! Add a candle or LED tealight and enjoy the warm, magical glow.
Notes
- This activity can get quite messy! Be sure to cover your work surface with a protective sheet before you begin.
- Make sure to flatten and smooth out each layer of tissue as you go. Kids might need help with this step. The smoother the layers, the brighter the shine—and the better your lantern will look.
- You can buy pressed flowers online or make your own. For instructions, check out our “How to Make Pressed Flower Candles” article.
- These lanterns aren’t weatherproof. Since school glue is water-soluble, they shouldn’t be left outside in the rain or heavy dew.
- This lantern can hold a real tealight, but since the inside surface may be uneven, it’s not safe to use while walking. Keep it on a solid surface and avoid carrying it around while lit—or opt for an LED tealight for a safer glow.
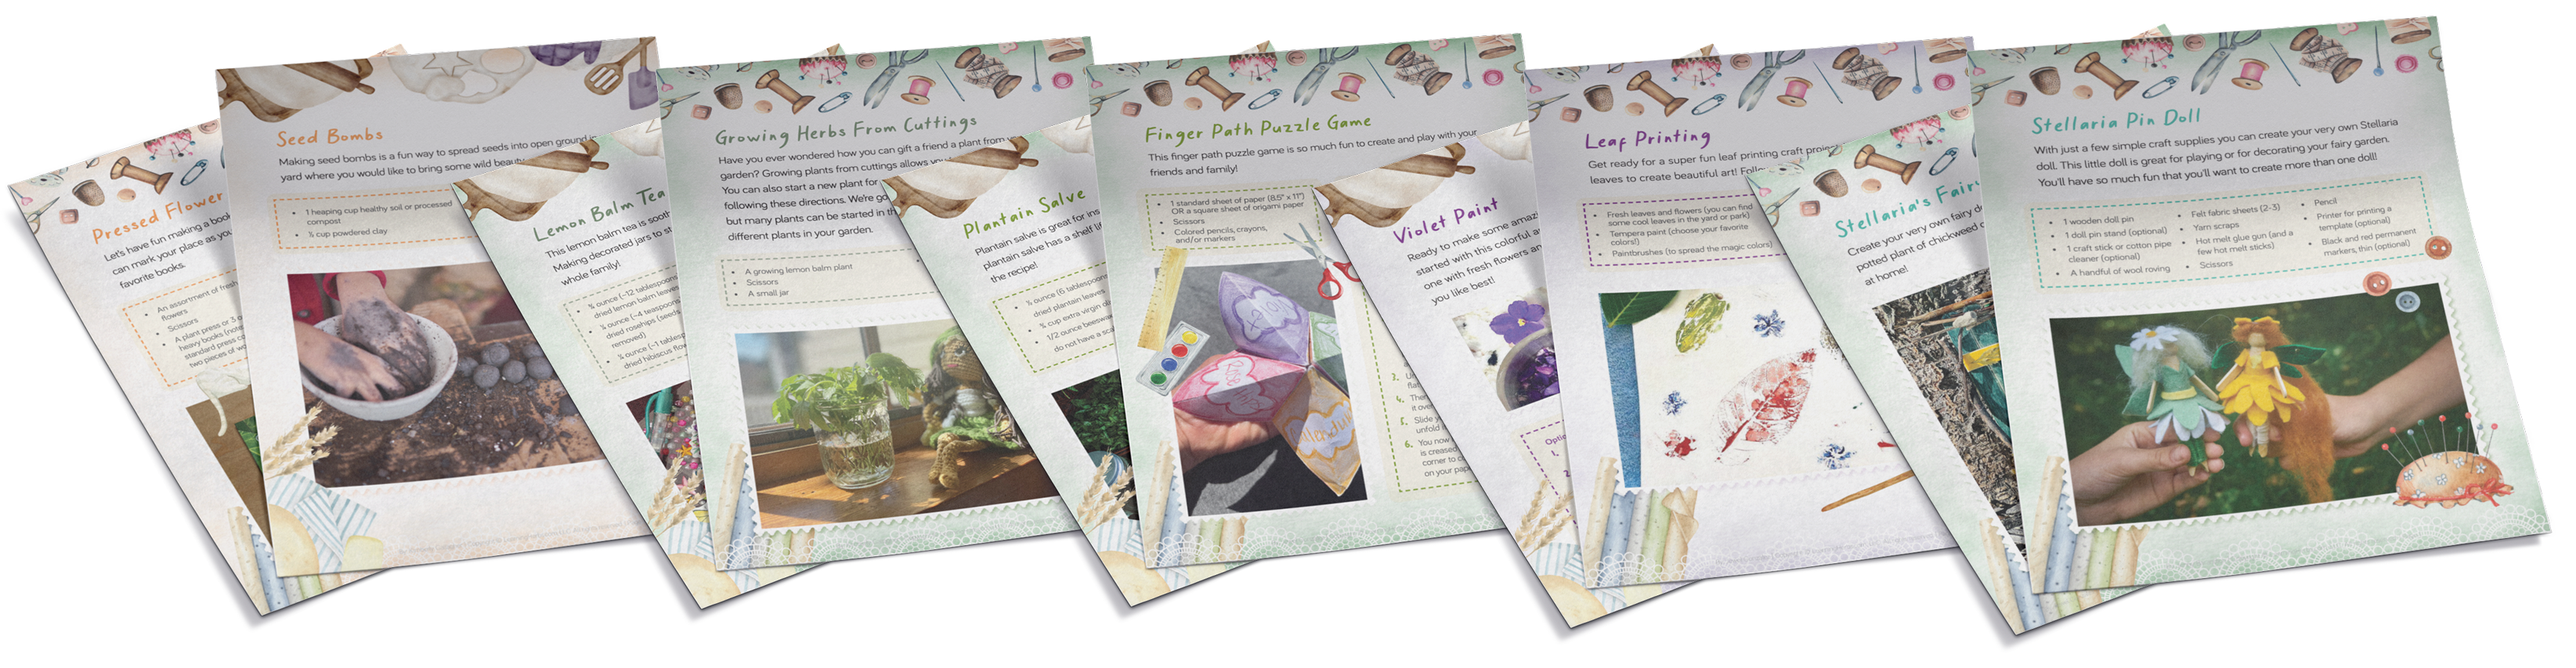
Making Botanical Crafts at Home
Want to make more botanical crafts at home? Check out Herb Fairies! Created by LearningHerbs co-founder Kimberly Gallagher, Herb Fairies is a book series and easy-to-follow learning system that teaches kids all about herbs. Each book comes with instructions for a beautiful herbal craft like suncatchers, fairy doors, dream pillows, and more. Check out Herb Fairies here.

Beltane: Beauty, Meaning & Magic
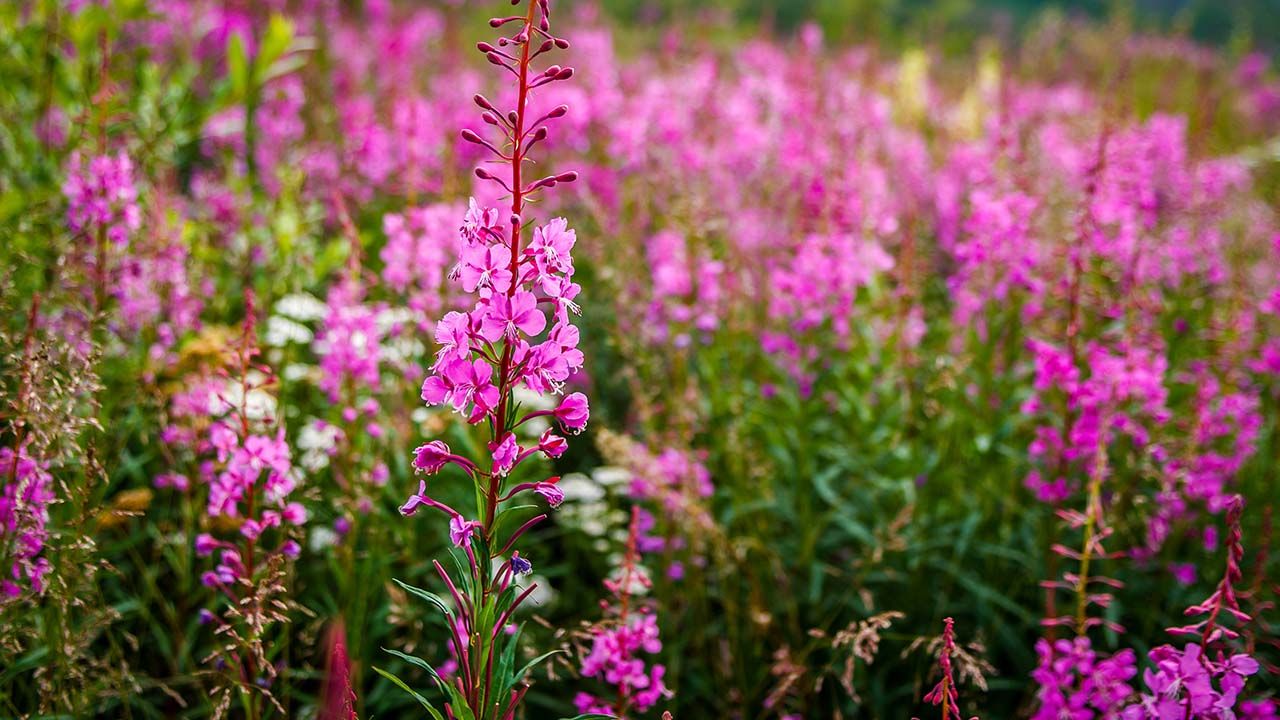
Beltane (usually celebrated around May 1st) is a joyful, fire-filled festival that marks the height of spring and the beginning of summer—though, honestly, where I’m from, May’s more about dodging drizzle and grumbling about the chill. Still, it’s all about fertility, growth, abundance, and the return of the sun. Plants used in Beltane crafts often carry deep symbolic meaning, drawn from both folklore and magical traditions. So, if you’re lucky enough to have any within arm’s reach (since it’s still early in the season for some) and want to make your lantern more personal, consider pressing your own flowers rather than buying them.
Here’s a selection of plants, along with their magical associations,1 that are particularly significant for Beltane—perfect for your lantern craft or any seasonal celebration:
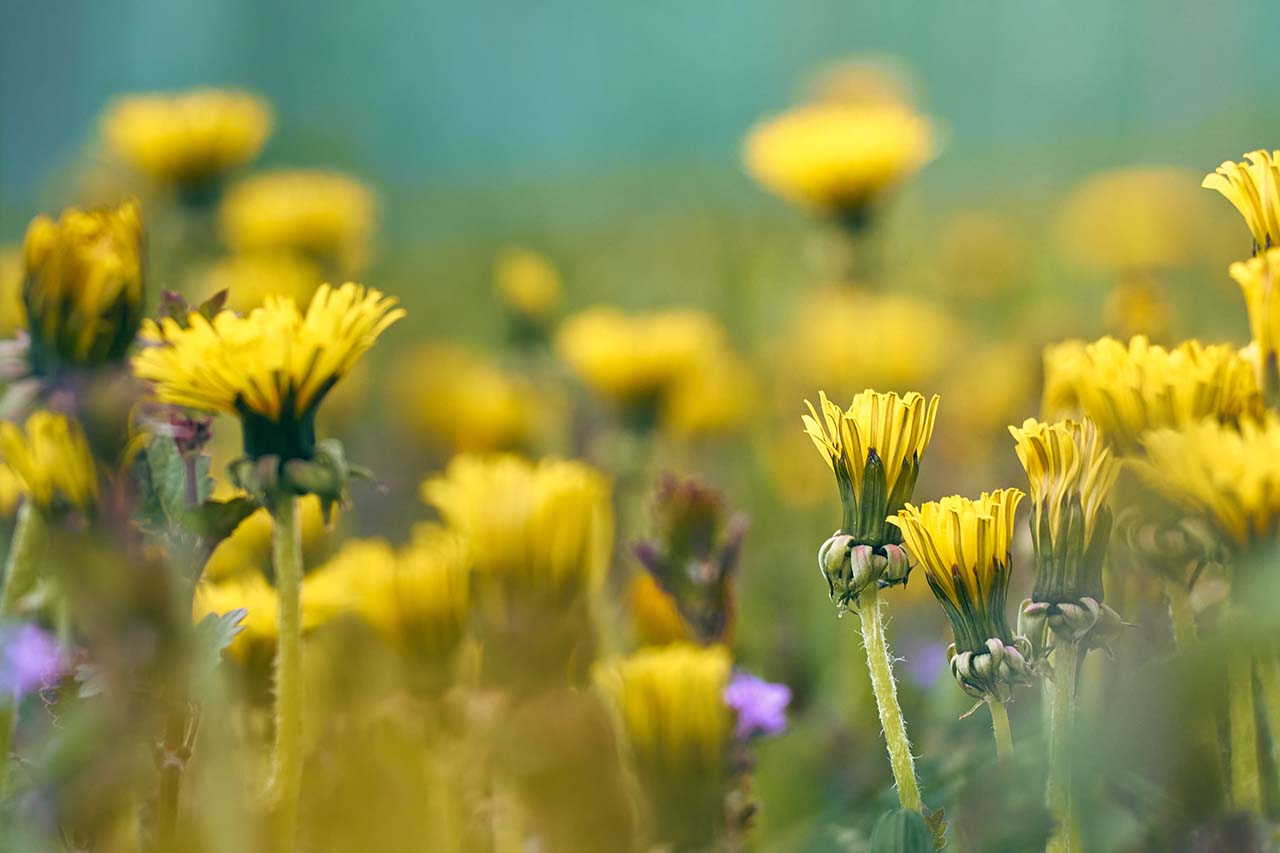
Dandelion (Taraxacum officinale) Associations
Dandelions embody resilience, wishes, and hope. They are connected to the sun and the spirit of persistence and joy. Add their cheerful petals to brighten your lantern and spark courage and new beginnings.
Hawthorn (Crataegus spp.) Associations
The blossoms of the hawthorn, a sacred tree of Beltane, symbolize love, protection, and the boundary between worlds. Associated with fairies and enchantment, it’s a powerful plant for inviting magic into your life. Add tiny blossoms (or a pressed leaf) for a protective charm and a nod to ancient Beltane traditions.
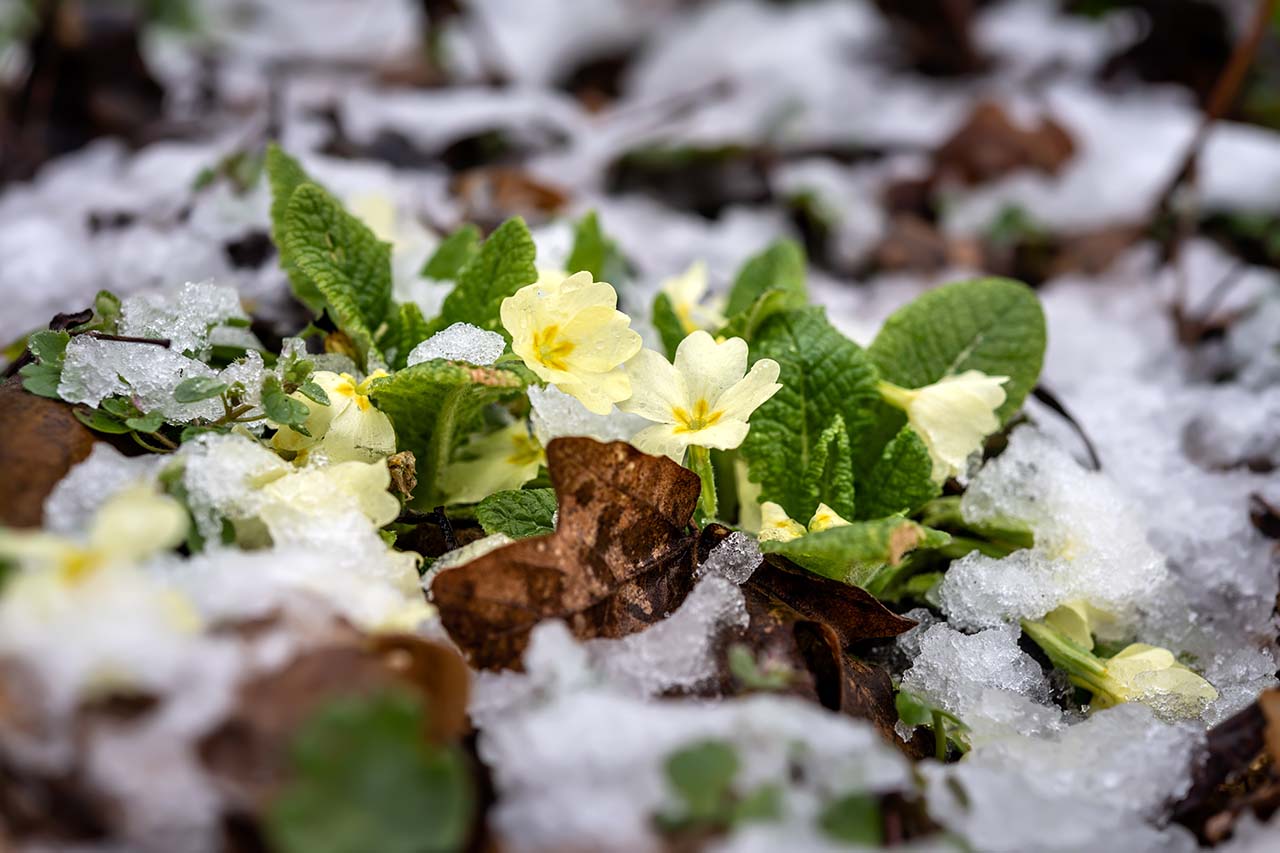
Primrose (Primula vulgaris) Associations
Primroses are linked to youth, beauty, and fairy magic. In folklore, they were believed to open gateways to the fairy realm. Add to your lantern to invite wonder, playfulness, and a touch of enchantment.
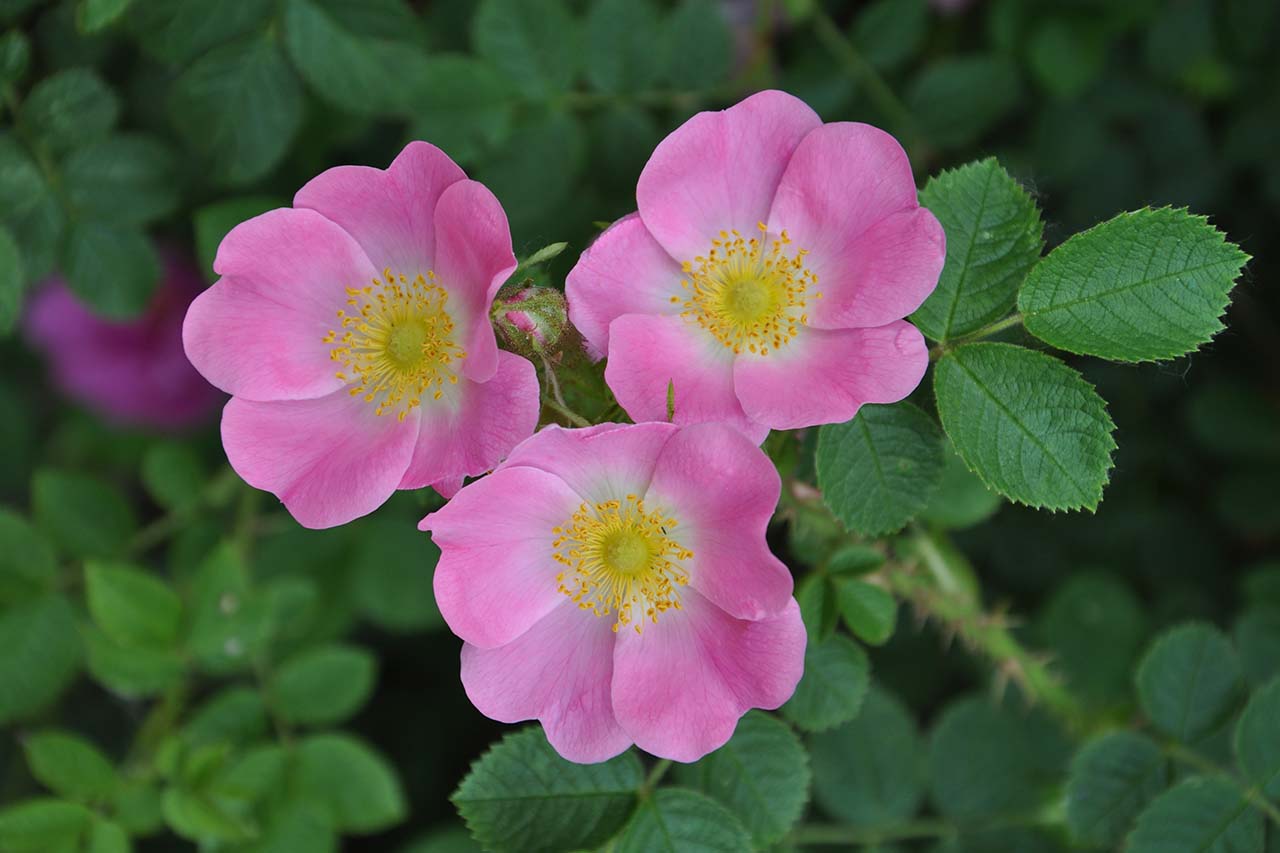
Wild Rose or Any Rose (Rosa spp.) Associations
A symbol of love, sensuality, and the heart. Roses have long been used in celebrations of union and devotion. Include a few pressed petals to honor romantic love, friendship, or your connection to nature.

Violet (Viola odorata) Associations
Associated with healing, modesty, and spiritual wisdom. Violets also connect to the divine feminine and emotional clarity. Add for a quiet, mystical energy and a balancing touch.
Here are a few frequently asked questions about paper lantern craft…
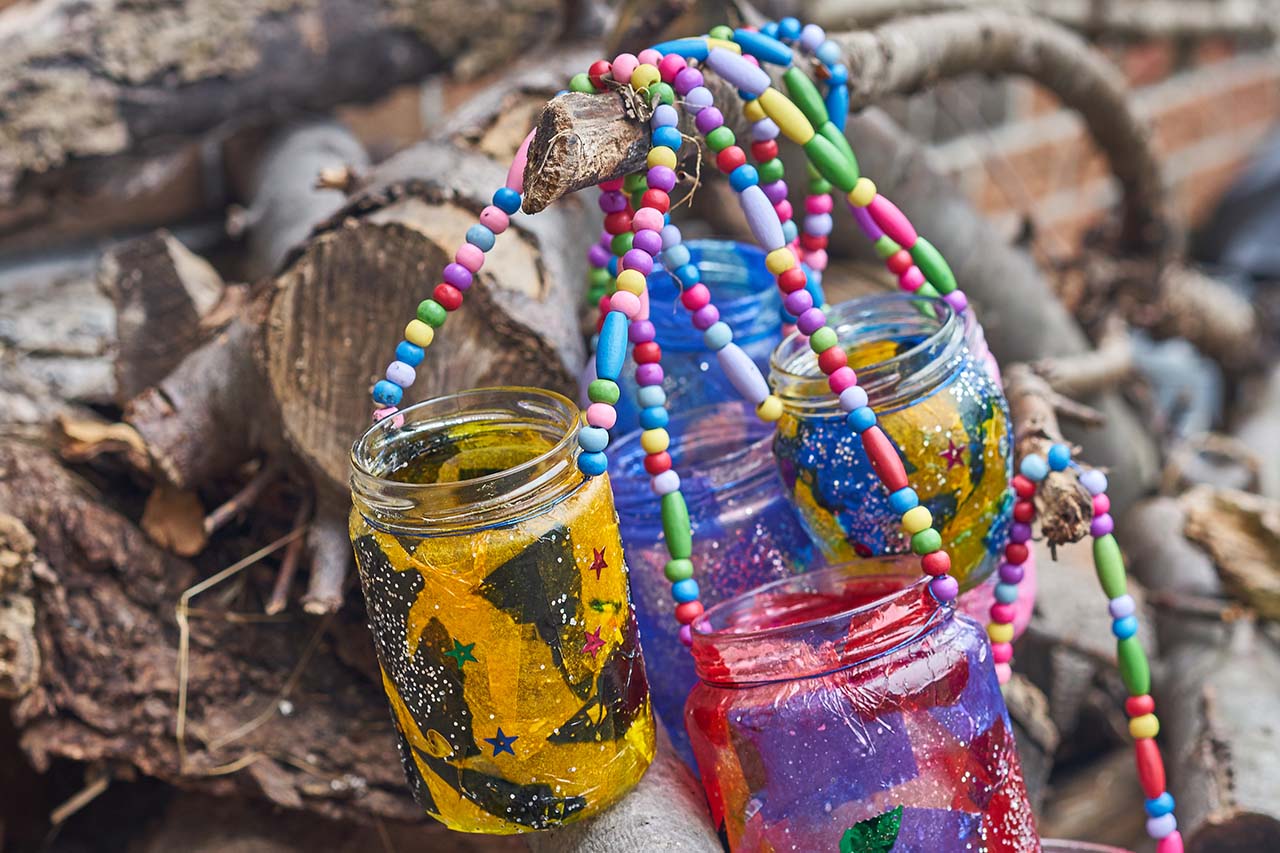
I don’t have enough time to make these—is there an easier way to make lanterns?
Yes! Here’s a simple jar lantern craft you can easily make at home when you’re short on time.
Is there a way to make these paper decoration lanterns waterproof?
Yes, you can make your glass lantern more water-resistant by using Mod Podge (or similar decoupage glue), which not only seals the tissue paper but also adds a protective, water-resistant layer. Keep in mind, though, that while Mod Podge will help make the lantern more durable and water-resistant, it is not fully waterproof for long-term outdoor use, especially in rain.
Can I make this lantern with colorful tissue paper?
Yes, you can use colorful tissue paper to craft your lanterns: either one solid color or a bunch of different ones for a playful pattern and pop of color.
Can I use regular paper instead of tissue paper?
You can use regular paper, but it may not give the same delicate, translucent effect that tissue paper does. Regular paper is thicker and less flexible, so it might not mold as smoothly onto the jar. If you decide to use it, you may need to add more layers of glue to get a similar effect, and the light may not shine through as beautifully as it does with tissue paper.
As a simple and accessible option, you can also use toilet paper or facial tissues for the craft. They become mushy very quickly and can be a bit harder to work with, but they’re still a viable choice for this project.
How do I press flowers?
To read more about pressing flowers, check out our “How to Make Pressed Flower Candles” article for a detailed step-by-step guide on how to press flowers for your craft.
Can these lanterns hold real candles?
The paper lantern can hold a real tealight, but since the inside surface may be uneven, it’s not safe to use while walking. Keep it on a solid surface and avoid carrying it around while lit—or opt for an LED tealight for a safer glow. As for the jar lantern, while it can get hot (so be mindful of that), it can hold a real tealight safely. That said, never leave candles unattended.

Footnotes
The Herbal Remedy Vault has all of our printable recipe cards...