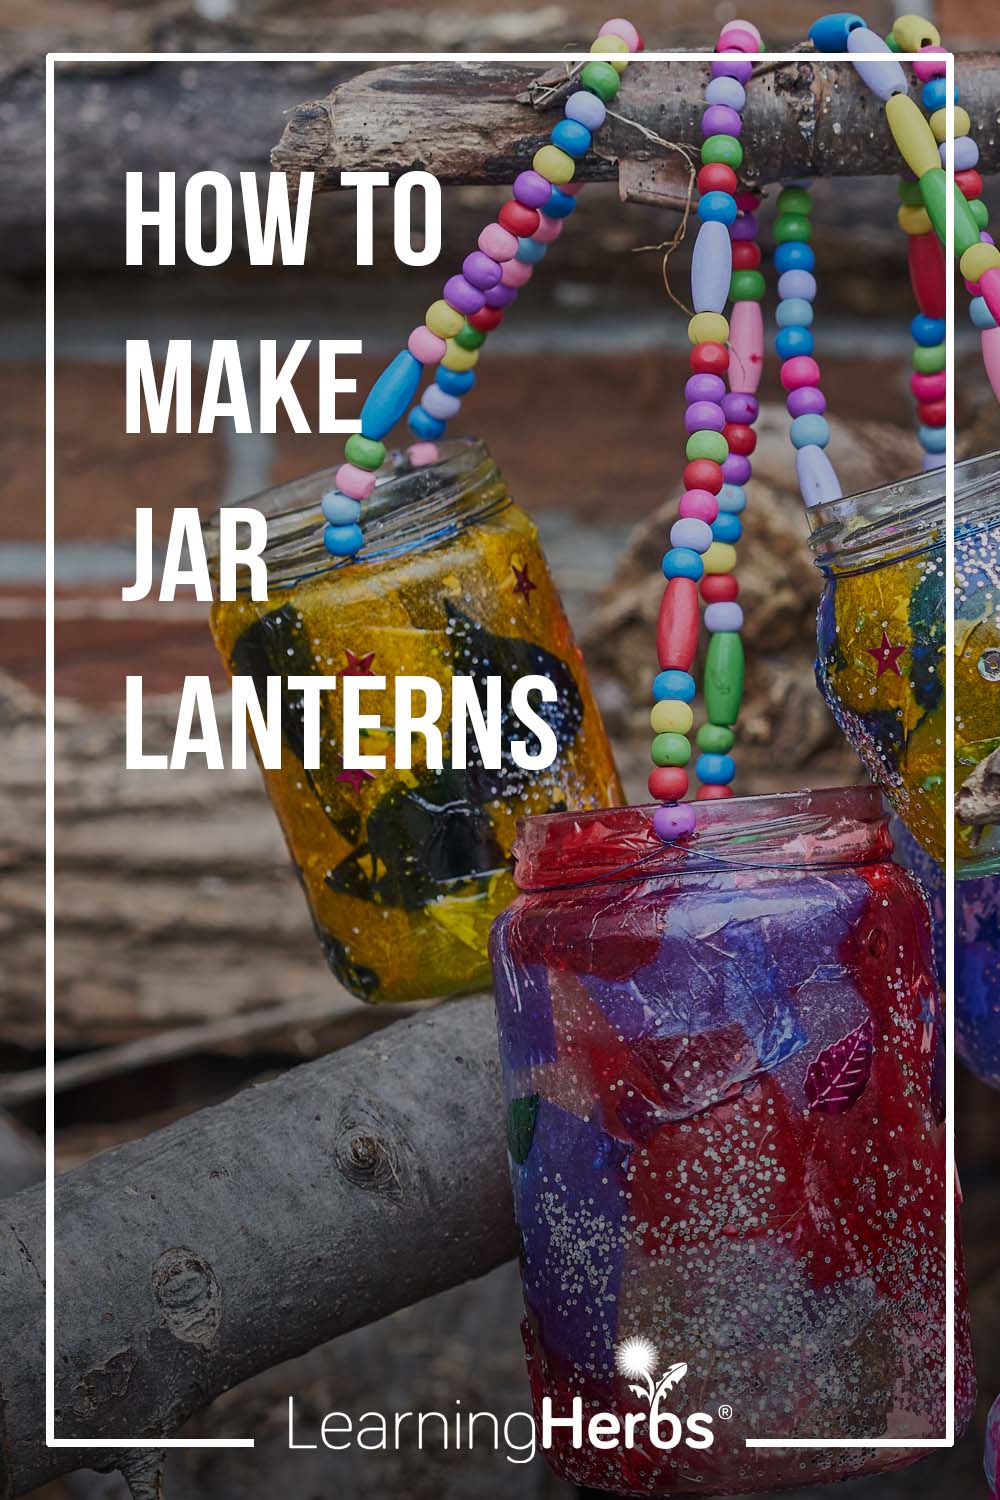
How to Make Jar Lanterns
Lanterns are a simple, elegant craft that’s fun for the whole family. These easy-to-make jar lanterns can add a little more sparkle to your backyard as you enjoy the warm summer nights. Whether you craft them with new mason jars or upcycle commercial food jars, you can make lanterns that beautifully illuminate your outdoor space.
Let’s dive into how to make these jar lanterns…
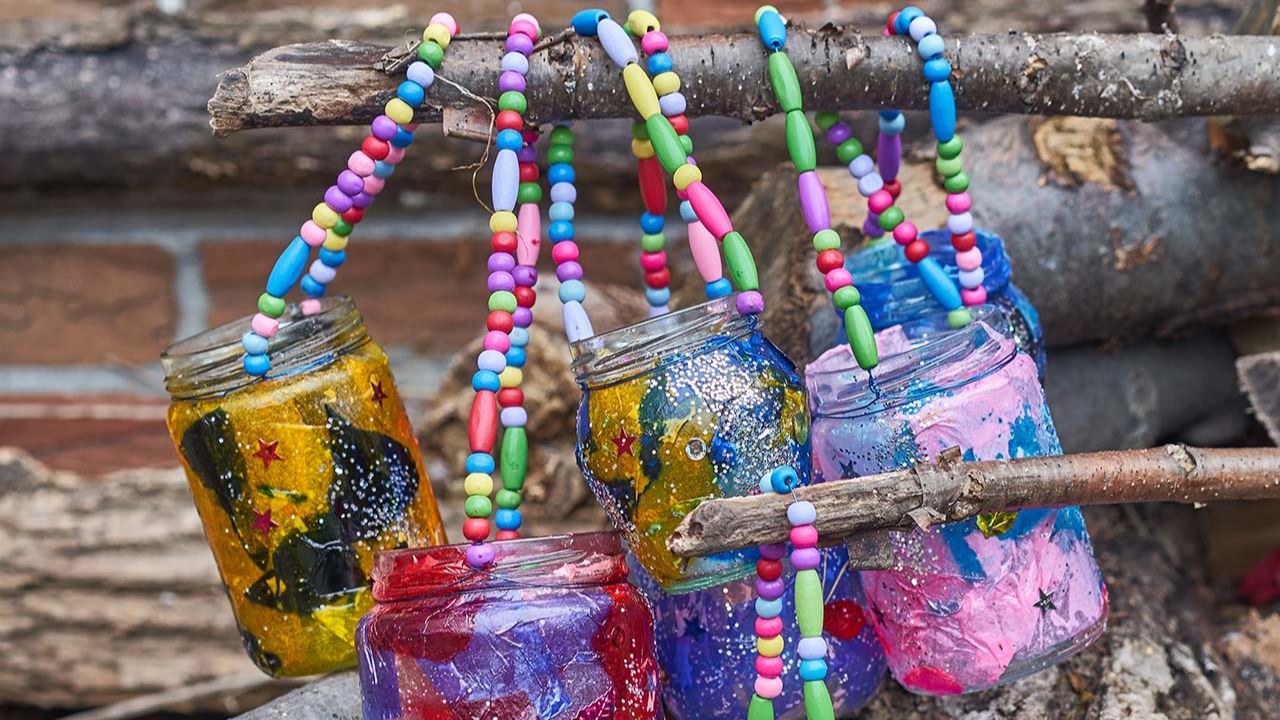
Jar Lantern
If you’re short on time or crafting with younger kids, this simple craft uses a glass jar to create a beautiful lantern. It’s quick to make and sturdy enough to safely hold a real tealight. If you have more time and want to make an elegant paper lantern, here’s how.
What you’ll need…
- Pint or half-pint jar
- Tissue paper (white or rainbow colors)
- School glue (at least one 5 fl oz bottle)
- Broad or sponge paintbrush (for spreading glue)
- Medium bowl
- Twine or thin wire (about 2 feet long)
- Pressed plants (optional)
- Wooden beads (optional)
Instructions…
- Using a paintbrush, mix equal parts glue and water in a medium bowl. Cover your surface with a protective sheet to catch drips and spills.
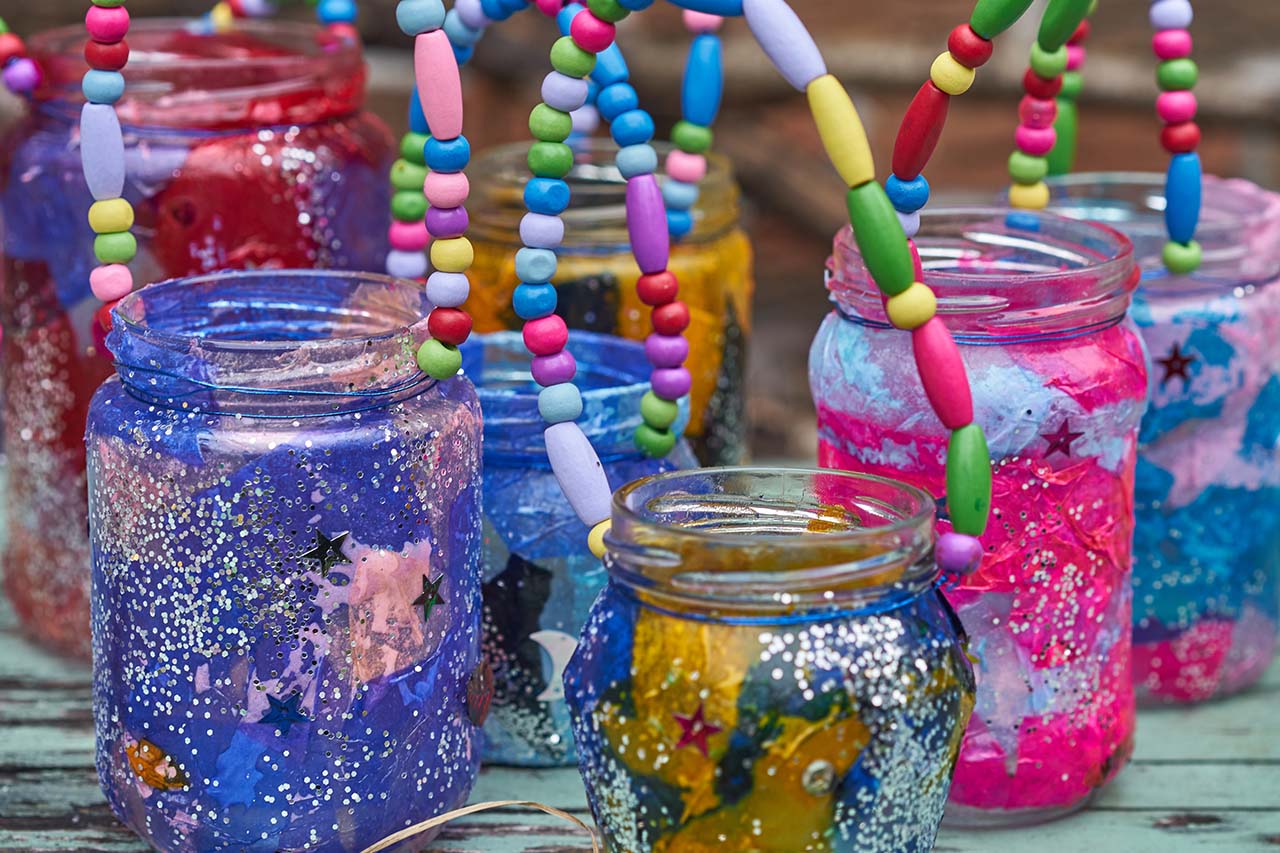
- Cut or tear the tissue paper into random shapes, no larger than 2 inches per side (1 to 1.5 inches is ideal). Use a variety of colors for a vibrant effect.
- Brush some of the glue mixture onto one side of the jar. Start arranging the tissue pieces on the glass—overlapping is great! The more color combinations, the better.
- Once the tissue is in place, gently brush more glue mixture over the top to seal it. Move to the next section of the jar and repeat.
- After covering the entire jar with at least one layer of tissue (plus some overlapping), brush on a final coat of glue mixture to seal it. If you're not satisfied with the color balance, feel free to add a few more tissue pieces here and there for extra pops of color—just make sure to cover them with glue as well. Note: Aim for one or two layers total. Adding too many layers will reduce the glow of the lantern and the vibrancy of the colors, as overlapping too many pieces can make the colors blend together into a duller mix. You can also add sparkles or sequins at this stage for a little extra magic.
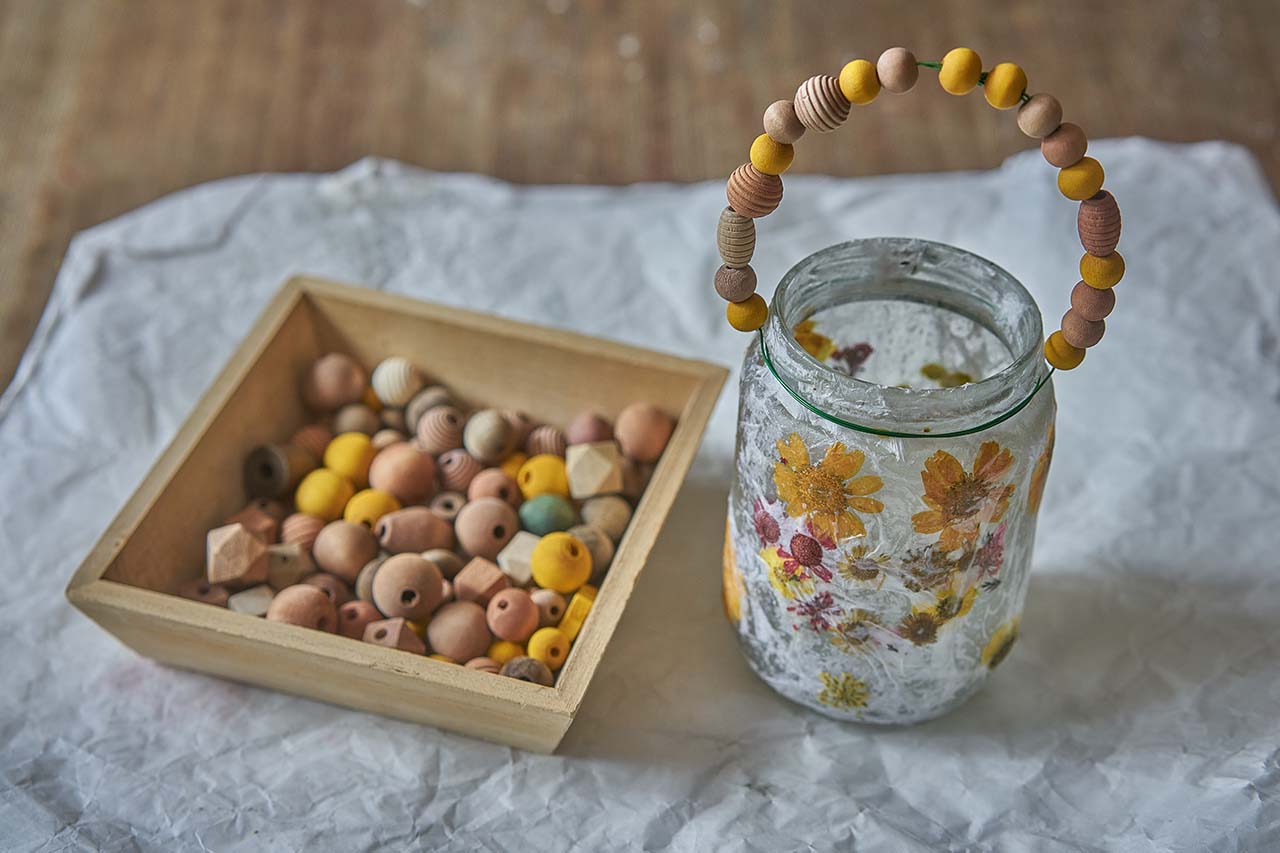
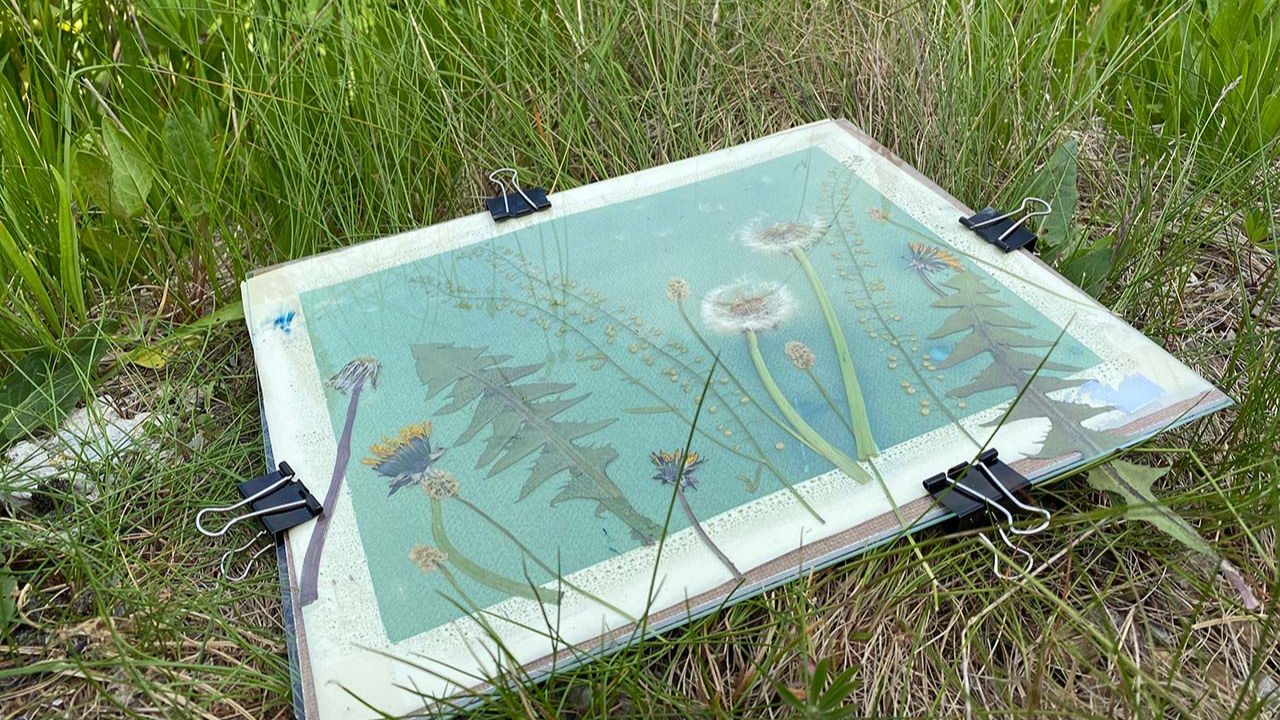
- Optional: If you’re using white tissue paper, you can add pressed plants just like in the paper lantern craft. In this variation, sandwich the plants between two layers of tissue and seal everything well with glue. You can also add a few plants on the outer layer for added depth. If doing so, make sure to cover the additions with glue again.
- Once your jar is completely dry, tie the twine or wire around the opening and create a handle. Add wooden beads if you’d like to decorate the handle.
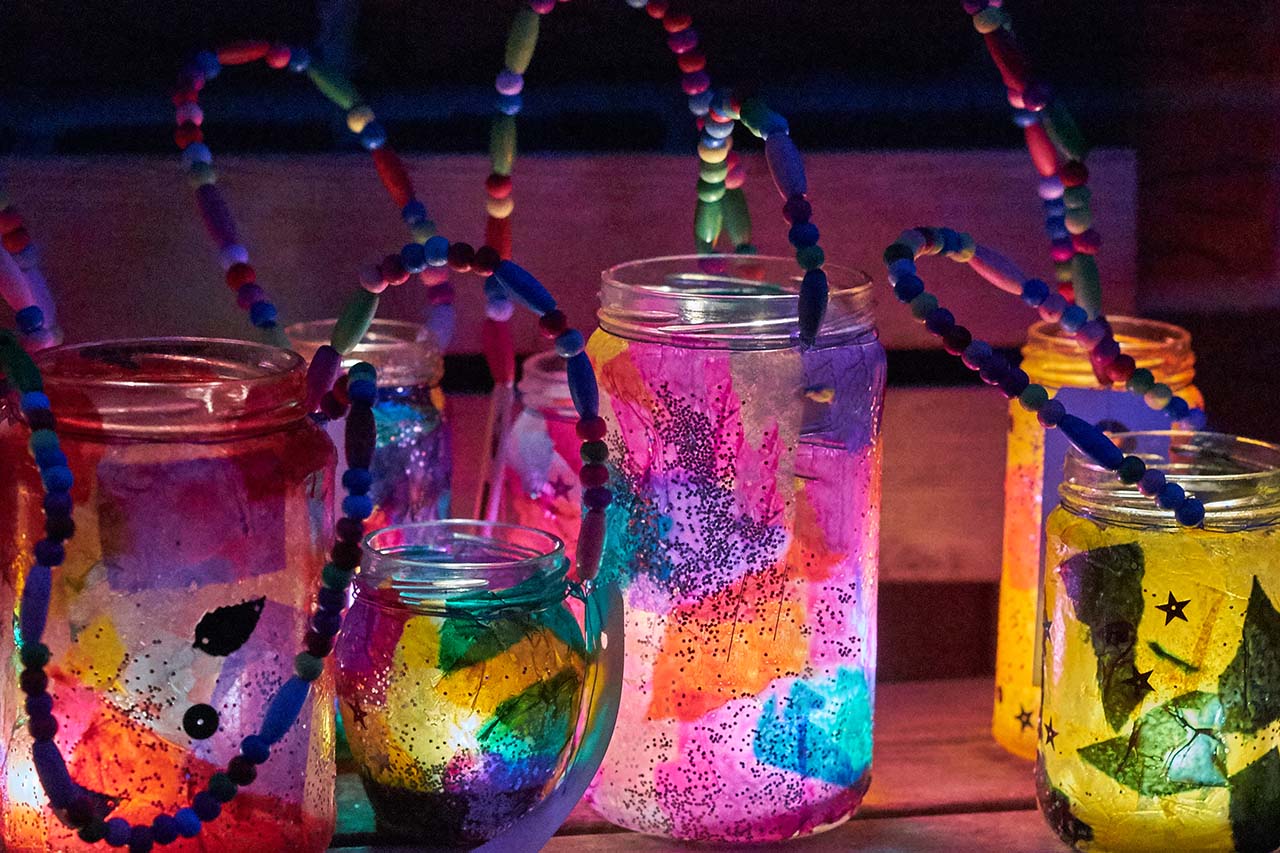
- Your jar lantern is ready! Add a tealight and bring it along for a lantern walk.
How to Use Commercial Food Jars
You can absolutely reuse jars from commercial foods for this craft! Collect a variety of shapes and sizes, wash them thoroughly, and you’re good to go. If the labels are stubborn, rub them with a bit of vegetable oil and let them sit for a while to help break down the glue. After soaking, you can use soap and hot water, along with a metal scrubbie or dinner knife for some extra force. The label should come off easily at this point!

The Herbal Remedy Vault has all of our printable recipe cards...