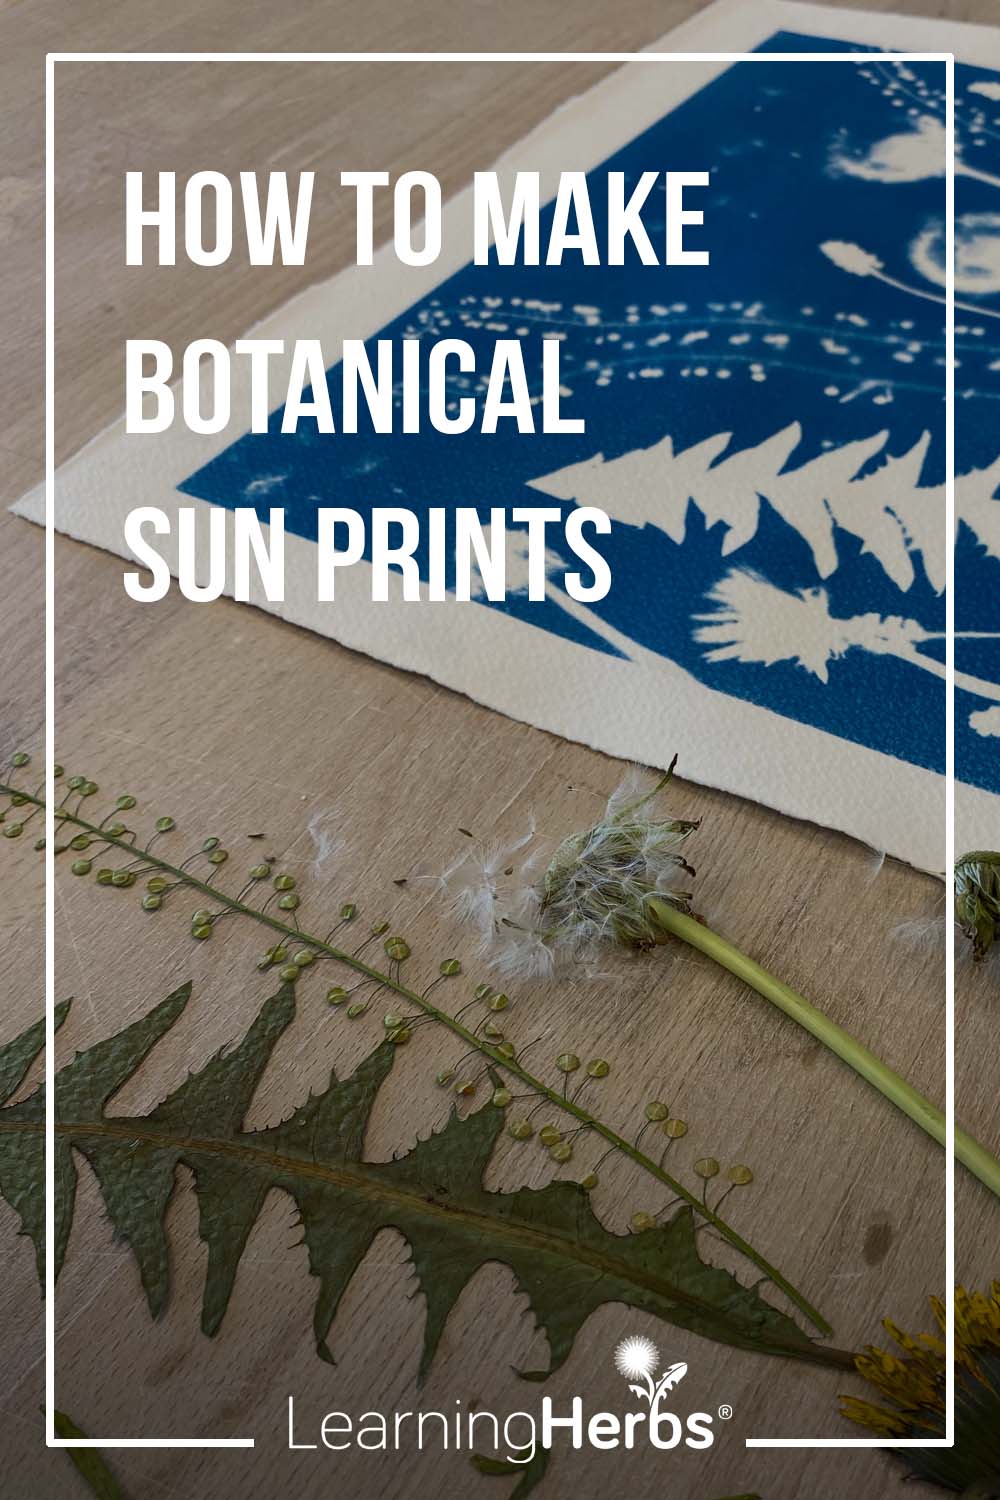
The Joy of Creating Botanical Sun Prints
The beauty of plants can linger in our minds and memories for ages. With a little creativity and a few ultraviolet rays, impressions can become lasting works of art.
Creating sun prints — also known as cyanotypes — offers a beautiful way to explore plant allies in a new and different light. This simple, hands-on art technique is accessible to both children and adults, the results are as versatile as they are striking. Sun prints can become greeting cards, notebook covers, framed wall prints, or even functional pieces like sachets, bags, seat cushions, and tablecloths. More than anything, they offer a meaningful way to engage with plants while creating lasting impressions of their forms on paper, fabric, and beyond.
An Introduction to Sun Prints
This age-old process of cyanotype printing was developed in 1842 by the English scientist and astronomer Sir John Herschel. The name cyanotype comes from the deep cyan-blue color that defines the finished print.
Around the same time, Anna Atkins created what is considered the western world’s first book of photography, Photographs of British Algae: Cyanotype Impressions, using this technique.1 Her work is not only visually stunning but remarkably expansive—documenting algae, ferns, and even mollusks. It’s worth noting that she pursued this work in a male-dominated field, supported by her father during a time when such encouragement was rare.
In the mid-1990s, I had the good fortune of spending several weeks with Fiona Robinson, a British author and illustrator of children’s books. Her book The Bluest of Blues2 led me into the world of cyanotype printing and Anna Atkins. I’ve explored many printmaking techniques over the years—linocuts, woodcuts, brass rubbings, and screen printing—but none compare to the simple joy of sun printing.

What You’ll Need
At its core, cyanotype printing requires just a few essentials: light-sensitive chemicals, a receptive surface, and water.
- Chemical Solutions: Cyanotypes are made by combining two solutions. Traditionally, these are referred to as Solution A and Solution B. Solution A is a 20% ferric ammonium citrate solution, made by mixing 20g of ferric ammonium citrate into 100ml distilled water. Solution B is a 10% solution of potassium ferricyanide, also mixed in distilled water.3 If you prefer simplicity, many companies offer pre-measured kits: just add water and you’re ready to go!
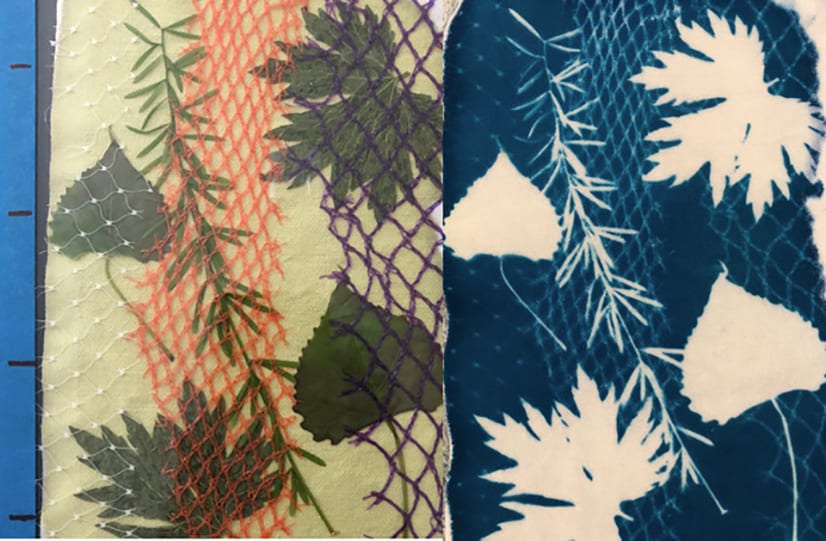
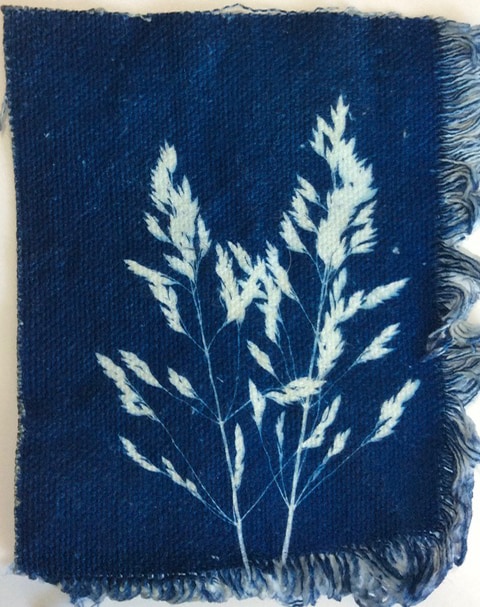
- Receptive Cyanotype Printing Surface: You can print on paper, fabric and even glass. Heavy canvas works beautifully when pre-washed and ironed. Papers vary—some are more cooperative than others—but mixed media, construction paper, and watercolor paper tends to yield reliable results. The images shown here were printed on either heavy canvas fabric, Canson Mix Media 98lb/160g paper, or Canson watercolor paper (140lb/300g).
- Water: No need for anything fancy. Regular tap water works just fine.
- Plant Material: Gather fresh leaves, flowers, stems, or roots. These will become your printing subjects.
- Other Supplies: Okay, so what else might we need? A piece of glass or clear plastic (to hold objects in place), clips or tape, a brush, and a timer will all come in handy.
How to Make a Sun Print
Step 1: Mix the Solutions
Combine equal parts of Solutions A and B. About 10ml of each will coat several sheets of cyanotype paper or a small piece of fabric. Keep in mind that fabric absorbs more than paper.
Step 2: Prepare the Printing Surface
Using a brush, coat your surface evenly. I like to brush in one direction and then cross over it to ensure full coverage. Avoid over-saturating during this stage of the cyanotype process.
When coating your cyanotype paper, be sure to work in a dimly lit room, shades drawn, door closed as the photosensitive solution reacts with ultraviolet (UV) light. A low lamp is fine if needed.
Once coated, place your materials in a dark, dry space. I place each sheet on a shelf in a closet, being careful that nothing overlaps, and allowing everything to dry in the dark. I usually let them dry overnight, though drying time can vary with humidity.
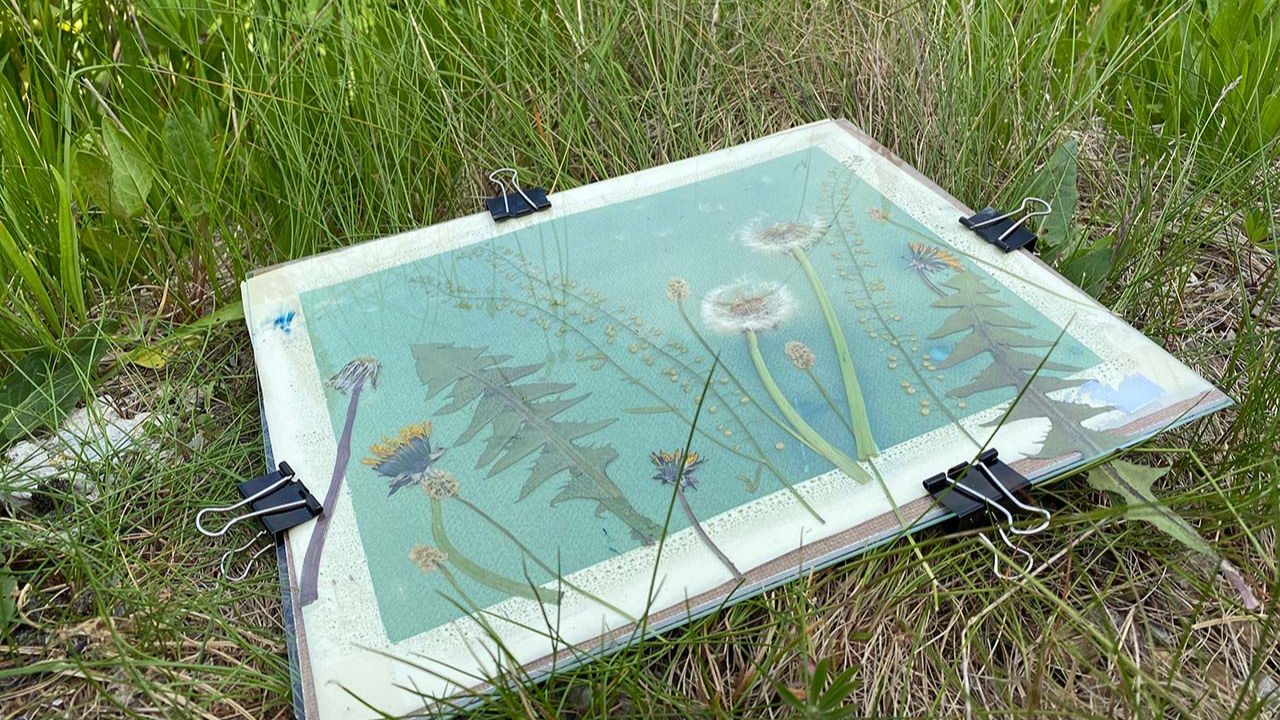
Step 3: Arrange the Objects
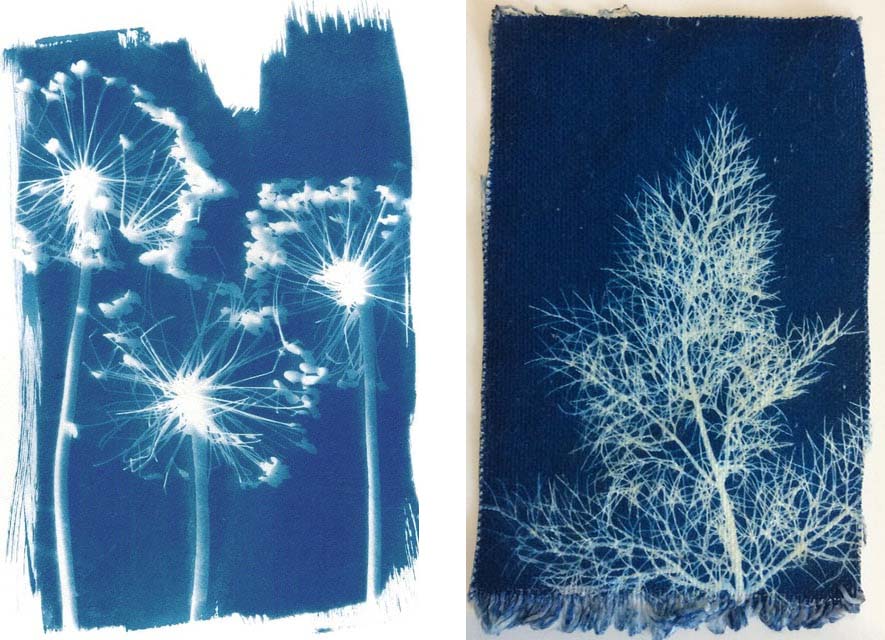
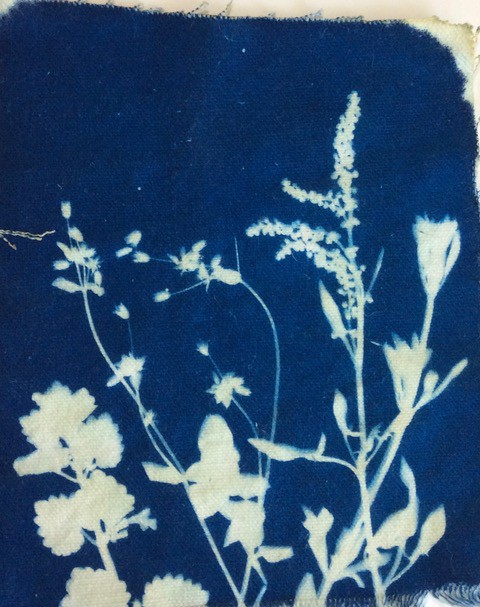
Now, what to print? Effects vary depending upon what’s being printed. Opaque objects—like leaves—create bold silhouettes, while more translucent materials can produce delicate gradients.
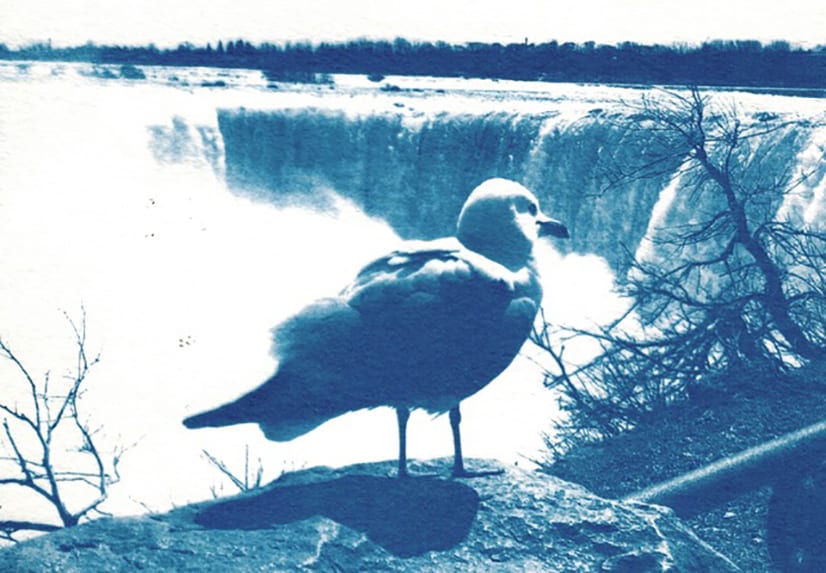
If more transparent items are used, or indeed transparencies of photographic images, gradations in coloration are possible as you can see from examples of my own prints. When I use a photographic image, I invert the black and white image to make a negative image, and copy it onto a transparency.
When ready to print, it’s time to arrange the natural items onto the light-sensitive paper and secure everything in place. I prefer doing this under glass and securing the glass with bulldog clips.
Step 4: Expose the Print
Now, it’s time to expose the material. I prefer working outside on a bright sunny day. A UV lightbox can be used in lieu of sunshine.
But how long should prints be exposed? This is a matter of trial and error and depends upon the strength of light waves and the print subject. For each of the prints shown here, my outside exposures under a bright Pennsylvanian noonday sun were between three to five minutes.
Generally, I carry things outside upside down, my timer at the ready. Prior to a final print, I do a series of timed exposures to gauge an ideal exposure time.
As the print develops, you’ll notice the color shifting from greenish-yellow to a deep blue—a transformation that never gets old. Amusingly, this shade of blue has also been described as a color akin to “the beauty spot on the wing of a mallard drake.”4
Step 5: Wash the Print
Bring each of the prints indoors and place them under running water.
The washing process continues through two stages: first while all of the non-reactive yellowish solution washes off, and then it continues until the water runs clear and not the slightest trace of blue tints the water. Generally, this takes anywhere from between five and twenty minutes, depending upon the printing substrate.
Step 6: Dry the Print
Lay your prints flat to dry. Once dry, they are permanent and ready to enjoy.
Helpful Hints
- Prepare in advance: gather your cyanotype kit and coat your materials the day before printing.
- Use fresh plant material whenever possible—wilting can affect detail.
- Thicker objects (like buds or roots) can create soft shadow effects—sometimes beautifully so.
- Exposure times will vary between bright sunlight and artificial UV light.
- Overexposure can wash out fine details—experiment to find the sweet spot.
Finally, get ready to become enthralled by sun printing. Creating cyanotypes is a very affordable art form and can become a lifelong hobby. Prints bring both a smile to the mind and joy to the heart. At any time, these are worth sharing.
Craving More Botanical Crafts?
If you’re excited to dive more into the wondrous world of botanical crafts, check out Herb Fairies. Created by LearningHerbs co-founder Kimberly Gallagher, Herb Fairies is a book series and easy-to-follow learning system that teaches kids all about herbs. Each book comes with instructions for a beautiful herbal craft like suncatchers, fairy doors, dream pillows, and more. Check out Herb Fairies here.
Frequently Asked Questions
Can the blue coloring be enhanced?
Yes. Near the end of the washing process, a small amount of hydrogen peroxide or vinegar added to the water bath can deepen the blue tones.
Can you change the color of the final print?
Absolutely. Toning with natural dyes like coffee, black tea, or hibiscus can shift the color into browns, greens, or reds.
Can I make sun prints while traveling or camping?
You can! Sun printing is a very portable activity. Prepare your cyanotype papers in advance and store them away from light. While freshly coated materials tend to yield the sharpest results, I’ve successfully used paper coated up to a week prior. Pretreated sun printing papers are also available, though I personally prefer preparing my own paper for a sturdier final result.
(Images by Leslie Alexander.)

Footnotes
The Herbal Remedy Vault has all of our printable recipe cards...